


Today I'm going to show you how to create an Auto Response email from Outlook that will reply to the sender on every occasion, rather than using an Out of Office that will reply only once to each unique sender.
This works for both shared mailboxes as well as licensed. In this example we're going to be showing you how to apply it to a Shared Mailbox as it's the more complicated version. Lets get started...
Log into your Office 365 administration panel and select the Shared Mailbox you wish to apply the Auto Response to. Ensure you are selecting the Shared Mailbox from the Active Users link with the Users group on the side panel. Do not select it from the Groups option because their a more settings available within the Active Users section. See the following example:
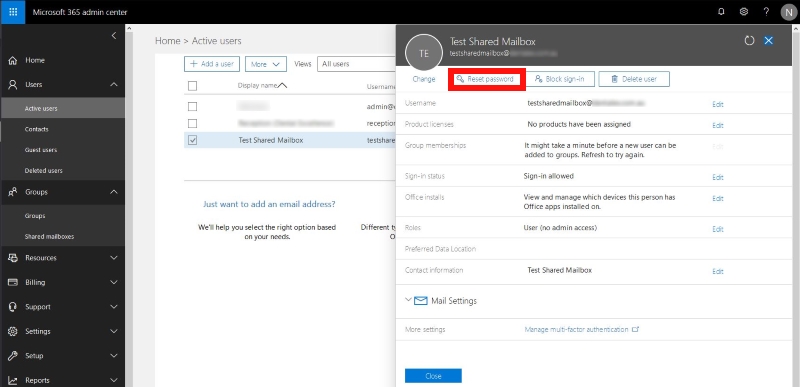
Click change password as shown in the example above and apply a password to your Shared Mailbox. This is a new feature and wasn't available previously.
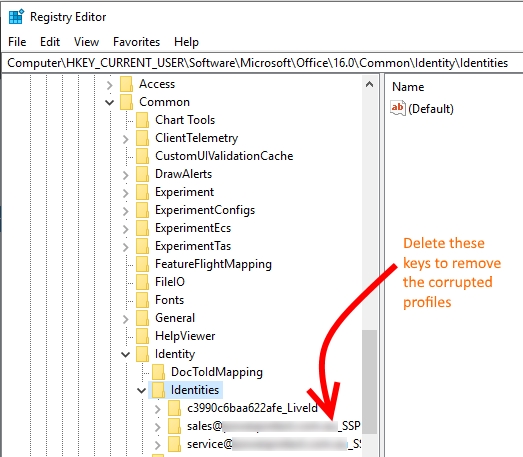
Once you've applied the password and saved it, you can then configure a separate profile in Outlook to connect to this Shared Mailbox. If you're not sure how to create a separate profile here is a good article that covers the process. Sometimes the profiles also get corrupted and can be manually deleted through the registry here:
Computer\HKEY_CURRENT_USER\Software\Microsoft\Office\16.0\Common\Identity\Identities\
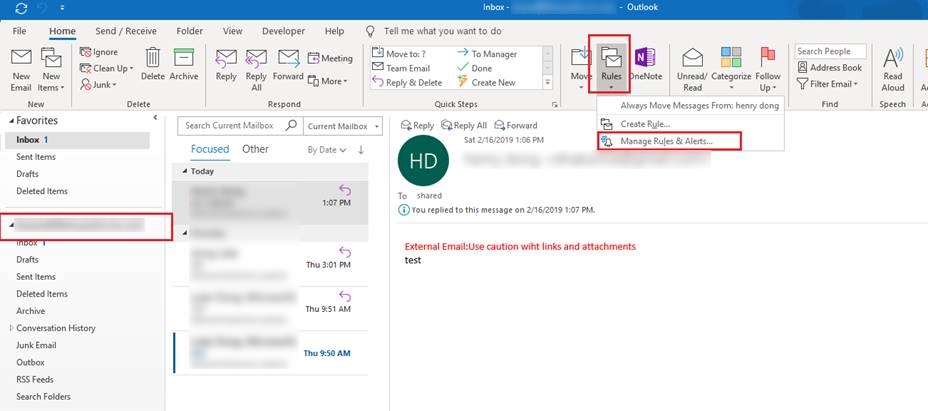
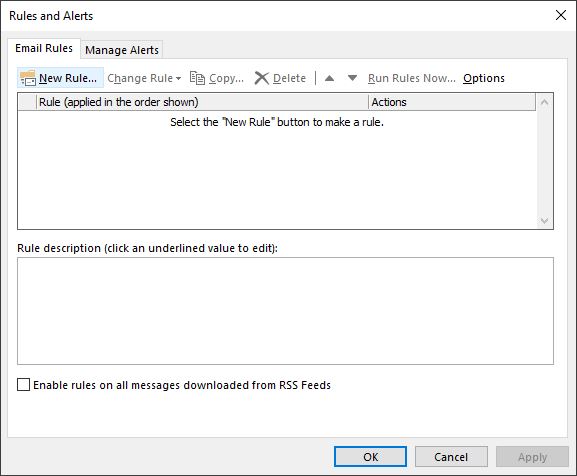
Once you've created the new profile, open Outlook using that newly created profile and ensure you've selected the Shared mailbox root and then click Rules > Manage Rules & Alerts from the ribbon menu as in the following example:
Now click New Rule:
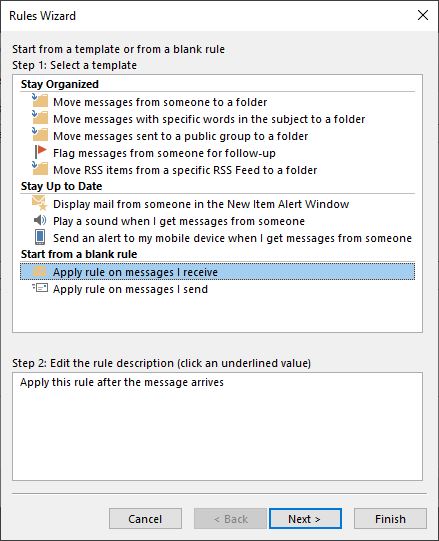
Then select Apply rule on messages I receive and click Next:
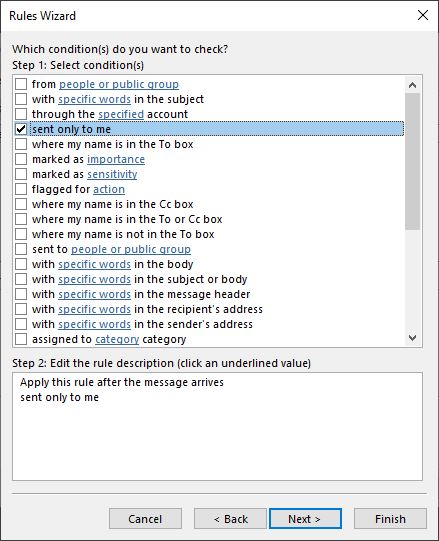
Select "Sent only to me" and click Next:
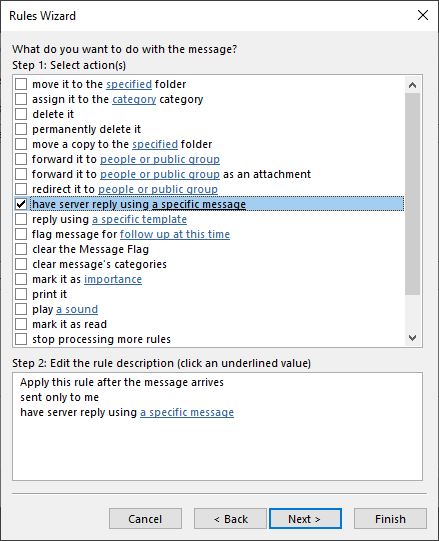
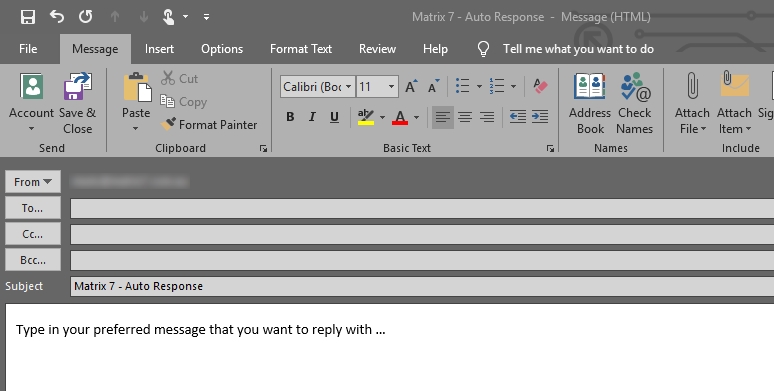
Select the option box "have server reply using a specific message". At the bottom of the rule window, click on the link – a specific message to provide the email wording you want in your reply:
As a result, a “New mail” will appear. This is a mail template that will ‘contain” the Automatic reply content. Click Save & Close when you're done. It should look similar to the following example:
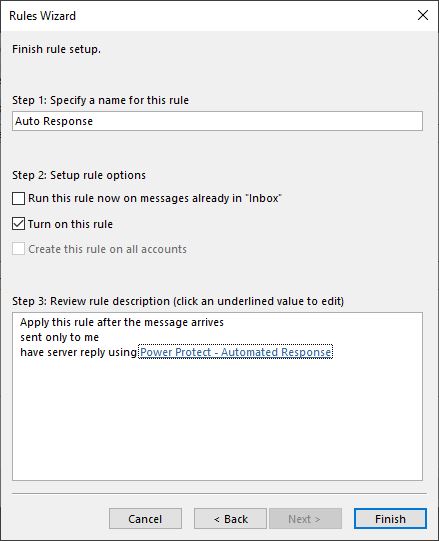
Finally name your Rule and click Finish:
You're all set! Anyone that sends an email to this account will now receive an Auto Response on every occasion.
If you've found this useful, you may want to sign up to our newsletter where you'll receive notices on when we post new articles and helpful "how tos". Just fill out your details below and we'll do the rest...


3 Responses