


Today I'm going to show you how to delete an unwanted disk from your Azure Virtual Machine.
Why would you want to do this? Well in our case, we had discovered that someone had added a premium disk to our setup that was costing in excess of $350.00 per month that we weren't using. You also may find that you don't need the extra storage and want to recoup the monthly expenditure.
Microsoft were good enough to refund the amount even though it had been attached to our VM for 2 successive billing periods.
Let's get started...
Firstly log on to your Azure account through the portal here...
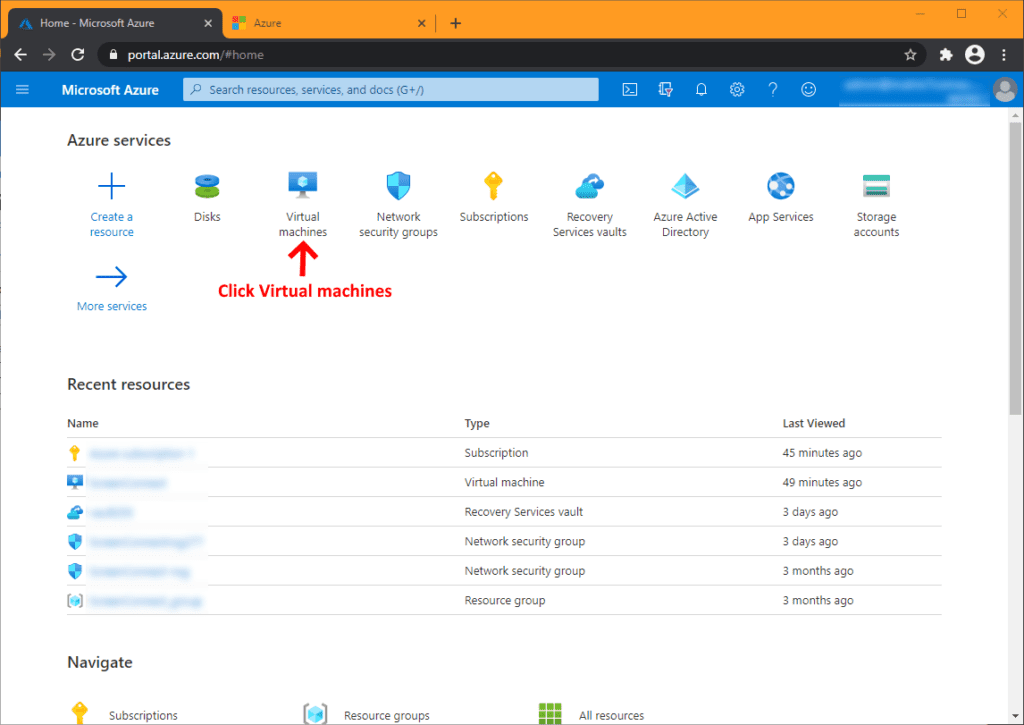
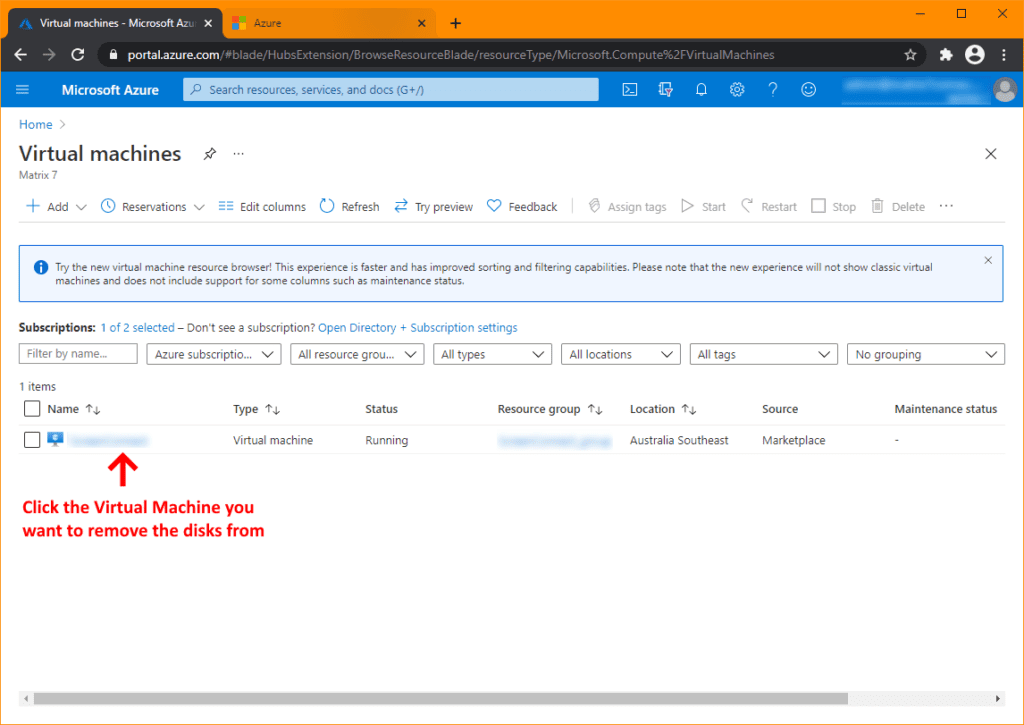
Now that you've logged onto your account you first need to detach the disk from your Virtual Machine. From your portal home page, click Virtual Machines as in the following screenshot:
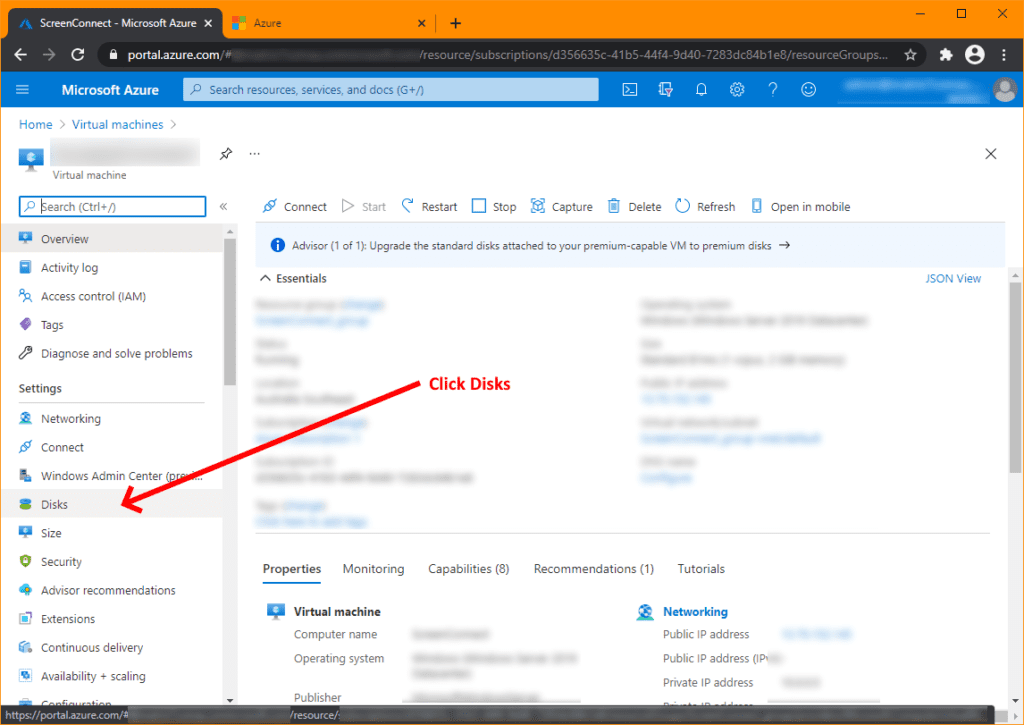
Before carrying out the following steps, ensure you have saved any data that's contained on the disks to be sure you don't lose anything of value.
When you open the Disks find the disk from the Data disk list that you want to remove and scroll to the right to reveal the 'X' detach disk option. Click the 'X' to detach it from your VM.
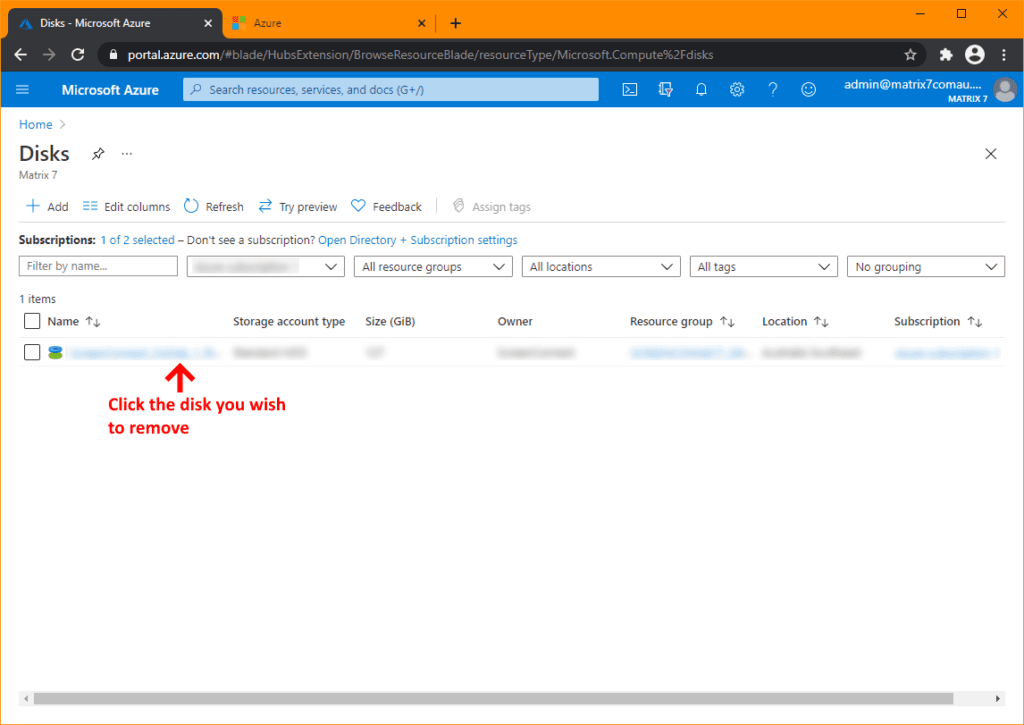
Now that you've successfully detached your disk from your VM, you'll now be able to delete the disk from your subscription.
Follow the screen shots below:

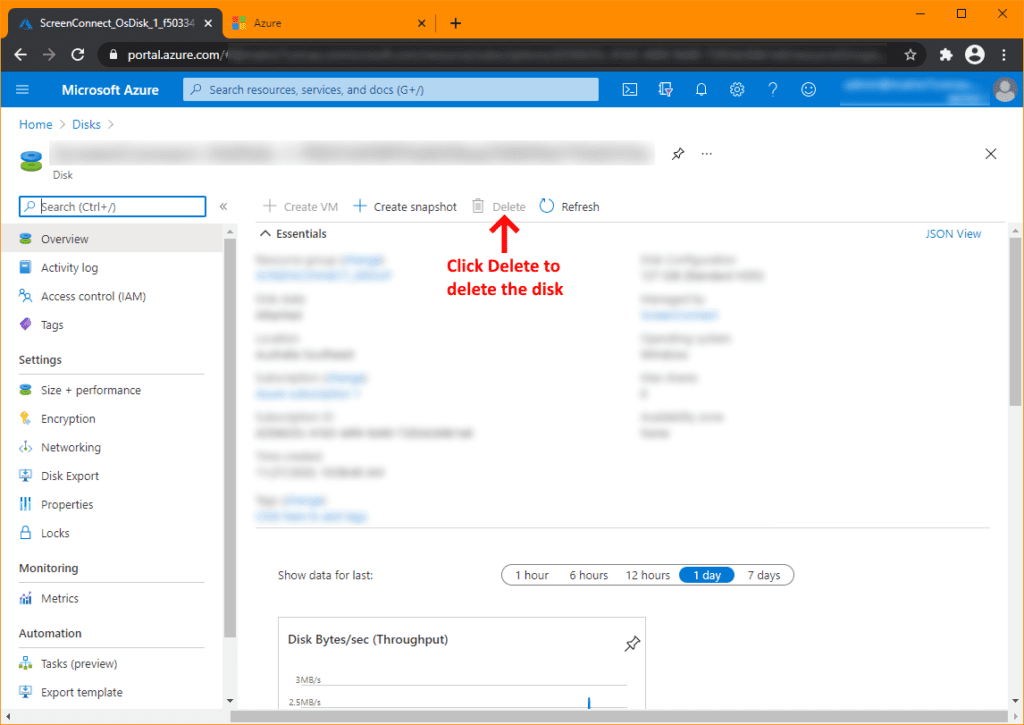
That's it, your task is complete.
If you've found this useful, you may want to sign up to our newsletter where you'll receive notices on when we post new articles and helpful "how tos". Just fill out your details below and we'll do the rest…


