
Now we'll install MailWatch with the web GUI for MailScanner. Let's begin. Open Putty and enter:
yum install php-gd php-mysql -y
Edit the /etc/php.ini file and ensure each variable below is set with these values:
short_open_tag = On
safe_mode = Off
register_globals = Off
magic_quotes_gpc = On
magic_quotes_runtime = Off
session.auto_start = 0
Save and close the php.ini file.
Change to the temp directory:
cd /tmp
Download the latest stable version of MailWatch:
wget http://sourceforge.net/projects/mailwatch/files/mailwatch/1.1.5.1/mailwatch-1.1.5.1.tar.gz
Extracted the package we just downloaded:
tar xzvf mailwatch-1.1.5.1.tar.gz
Change directory to access the newly extracted files:
cd mailwatch-1.1.5.1
Now we'll create the database:
mysql -u root -p < create.sql
Login to mysql as a root:
mysql -u root -p
We'll now create a MySQL user and then set password and configure MailScanner for SQL logging. In this example we're creating a user called mailwatch with a password of letmein. (Change the username and password to suit your needs):
GRANT ALL ON mailscanner.* TO mailwatch@localhost IDENTIFIED BY 'letmein';
GRANT FILE ON *.* TO mailwatch@localhost IDENTIFIED BY 'letmein';
FLUSH PRIVILEGES;
show databases;
Now we'll edit the MailWatch.pm file and change the database values to suit the values we just created above. The file is located here /tmp/mailwatch-1.1.5.1/MailScanner_perl_scripts/MailWatch.pm. The variables we need to change are:
my($db_name) = 'mailscanner';
my($db_host) = 'localhost';
my($db_user) = 'mailwatch';
my($db_pass) = 'letmein';
Now we need to move MailWatch.pm to /usr/lib/MailScanner/MailScanner/CustomFunctions like so:
cd MailScanner_perl_scripts
cp MailWatch.pm /usr/lib/MailScanner/MailScanner/CustomFunctions
Now we'll create the MailWatch web user. This is the user you will log onto the web GUI with:
mysql mailscanner -u mailwatch -p
Once logged on run the query below:
INSERT INTO users SET username = 'admin', password = md5('letmein'), fullname = 'MAilwatch Administrator', type ='A';
Using the query above, you would have created a user called admin and the password is letmein. Change these values to suit your needs.
We're now ready to install MailWatch. Change back to the MailWatch Folder:
cd ..
Move mailscanner folder for web root folder:
mv mailscanner /var/www/html/
Change directory to the mailscanner folder in web root directory:
cd /var/www/html/mailscanner
Set the folder permissions as outlined below:
chown root:apache images
chmod ug+rwx images
chown root:apache images/cache
chmod ug+rwx images/cache
We'll now create a conf.php file by copying conf.php.example file:
cp conf.php.example conf.php
Now edit the following database values to suit the values you created earlier. In my case the user was mailwatch and password was letmein.
define('DB_TYPE', 'mysql');
define('DB_USER', 'mailwatch');
define('DB_PASS', 'letmein');
define('DB_HOST', 'localhost');
define('DB_NAME', 'mailscanner');
Now we need to stop the MailScanner service:
service MailScanner stop
Now we'll edit the /etc/MailScanner/MailScanner.conf file:
Ensure that the variables below are set as shown:
Always Looked Up Last = &MailWatchLogging
Detailed Spam Report = yes
Quarantine Whole Message = yes
Quarantine Whole Messages As Queue Files = no
Include Scores In SpamAssassin Report = yes
Quarantine User = root
Quarantine Group = apache (this should be the same group as your web server)
Quarantine Permissions = 0660
Save and close the /etc/MailScanner/MailScanner.conf file.
Edit the file /etc/httpd/conf/httpd.conf. Go to the end of the file and add:
#Start of add
<VirtualHost *:80>
# Admin email, Server Name (domain name) and any aliases
ServerAdmin [email protected]
ServerName 192.168.0.150
ServerAlias 192.168.0.150
# Index file and Document Root (where the public files are located)
DirectoryIndex index.php index.html
DocumentRoot //var/www/html/mailscanner
</VirtualHost>
#End of Add
Make sure you change the ServerAdmin email address to your email address and also the IP addresses above (192.168.0.150) to your servers IP Address. Save and close the file.
Now we'll restart the MailScanner service:
service MailScanner start
We'll also restart the web server Apache:
service httpd restart
Now open up your browser and type in the IP address of your server like:
http://192.168.0.150
You should now see the MailWatch log on screen:
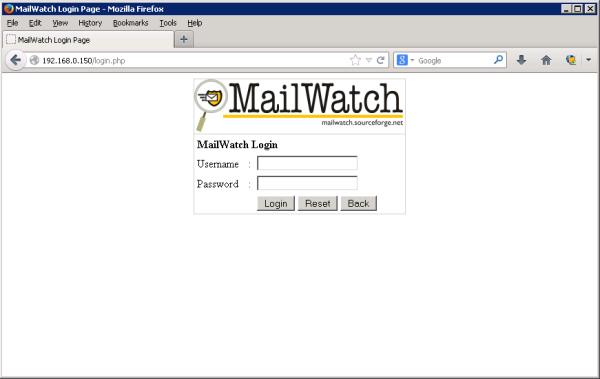
Type in your username and password that you set earlier in this tutorial. Mine in this example was admin and password was letmein.
One final thing, I highly advise you to install and configure BIND DNS on your system for optimal results and spam protection. You can see a quick tutorial on this subject by clicking here...
All done! Consider yourself a superstar!!! 🙂
One final thing you may want to do it add a DNS bind service to your install. Here is a quick how to. You could even call this Part 8