


Today I'm going to show you how to setup an FTP server on FreeNAS so remote users can upload files to your FreeNAS storage device.
Please note the FTP itself is not regarded as a secure method of handling file transfers, but if setup correctly and with well setup Firewall rules, it can be a very good way to provide things like off site backup storage. Software packages like StorageCraft ImageManager support the FTP protocol out of the box as do other backup providers.
Also, by Firewall rules I mean limiting the IP Addresses allowed to access the FTP service, so in effect only locations you explicitly allow through your Firewall can gain access thus limiting your exposure.
Before we begin, I'm assuming you have a FreeNAS server up and running and you can access the Web UI Administration portal. In my case, the admin Web UI is accessed via the following URL:
http://192.168.8.50/ui/
Let's get started...
I'm assuming you have a Storage Pool setup and ready to have Datasets created.
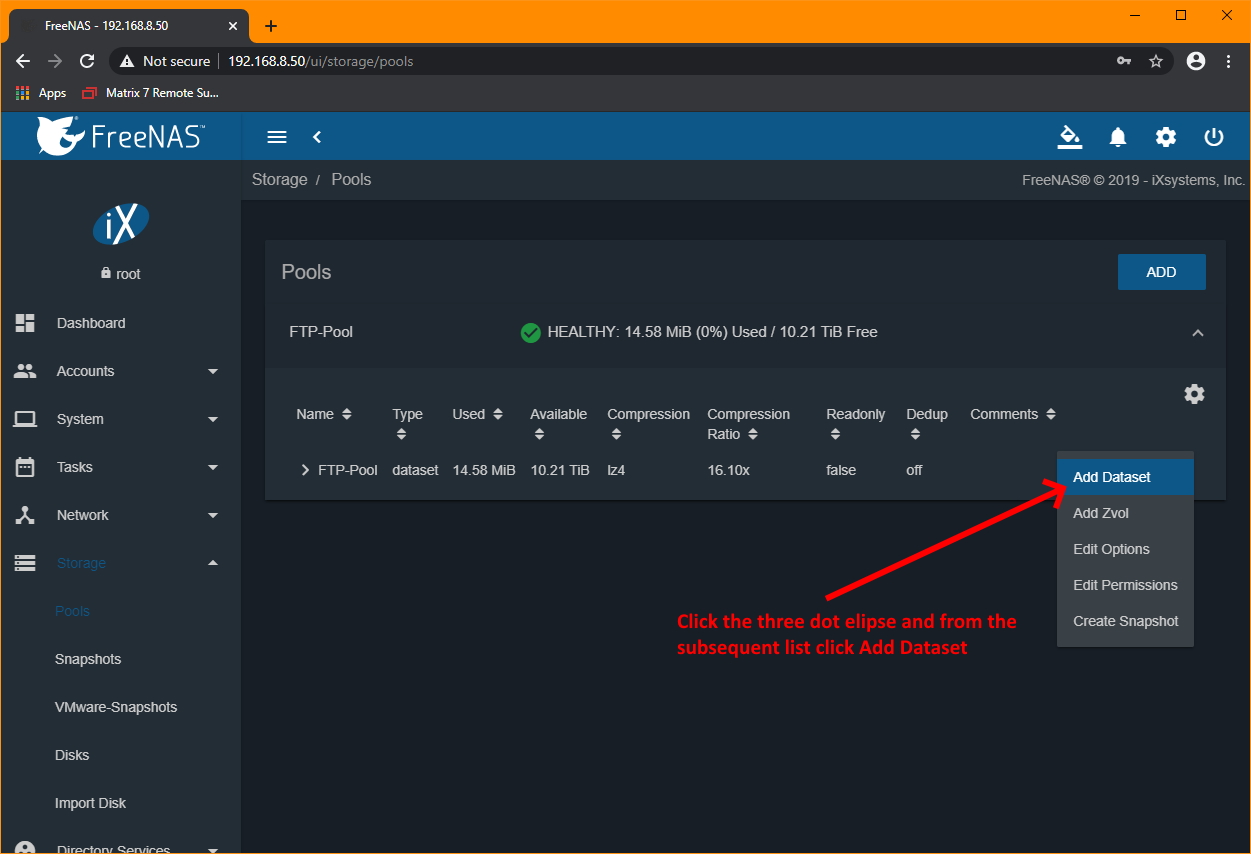
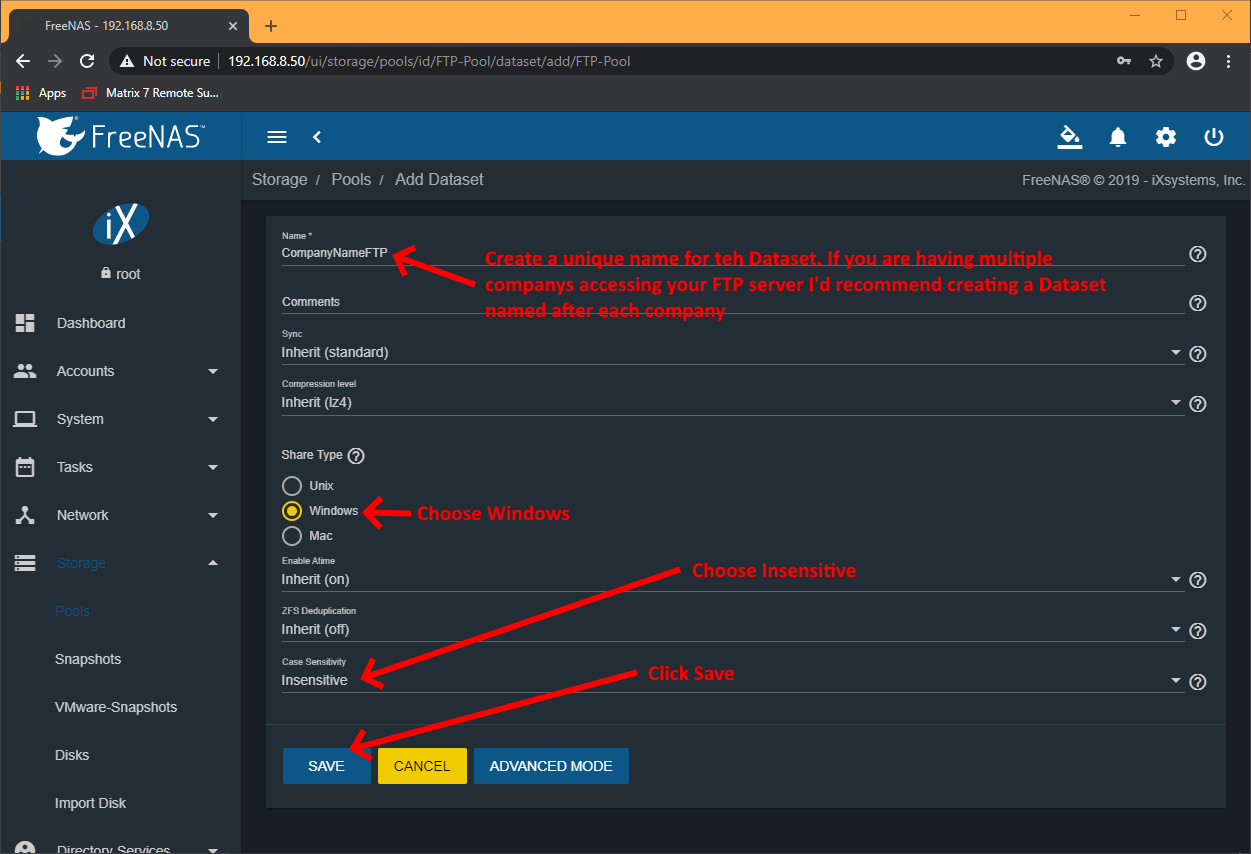
Firstly we're going to create a new Dataset in your Pool. Log onto your FreeNAS admin Web UI and click Storage > Pools from the left hand side options menu and you should have something similar to the screenshot below. Notice that the Pool I have created is FTP-Pool, but yours may be different. Now, follow the instructions on the screenshots below:
If you're going to make your FTP server available to multiple external users or organisations, I'd recommend creating a Dataset for each company/user:
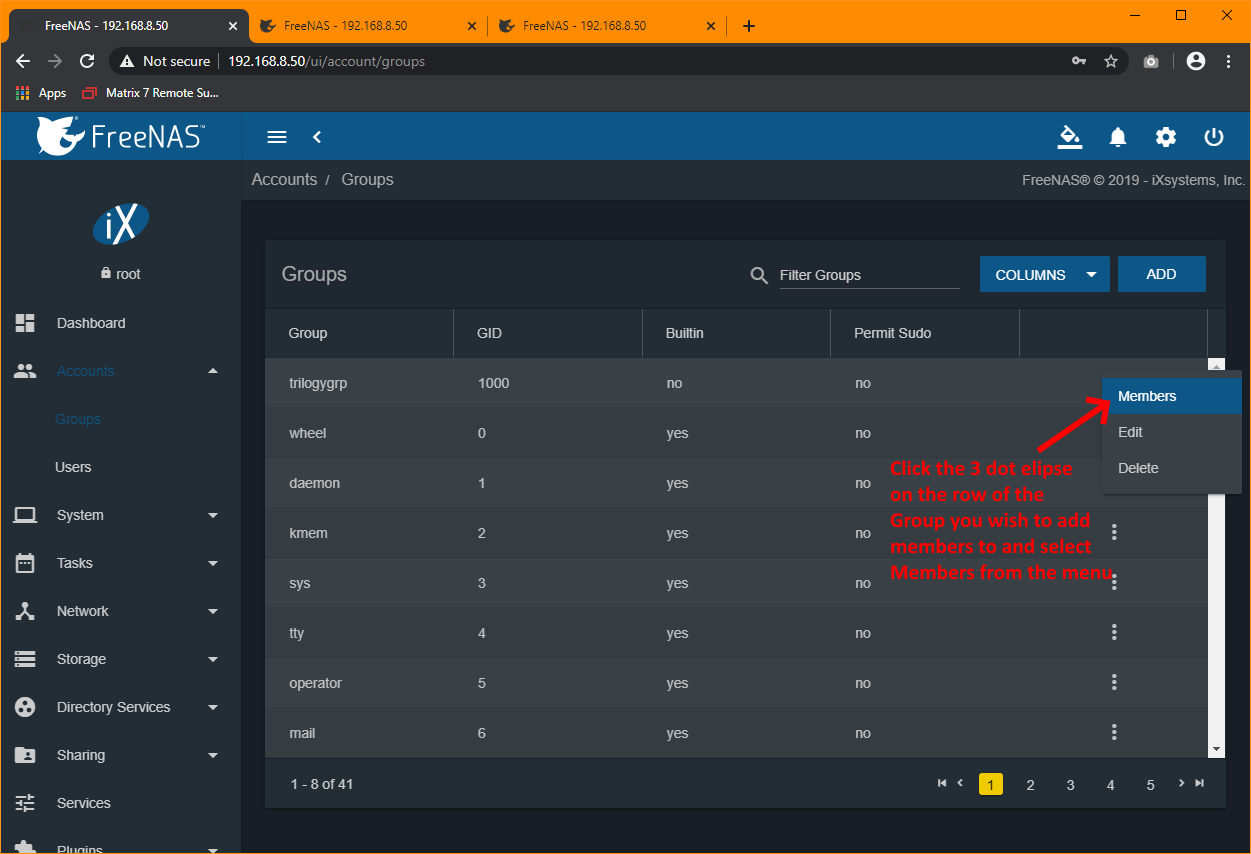
Now we're going to create new Group to house the new user. From your FreeNAS options menu on the left select Accounts > Groups and follow the instructions below:

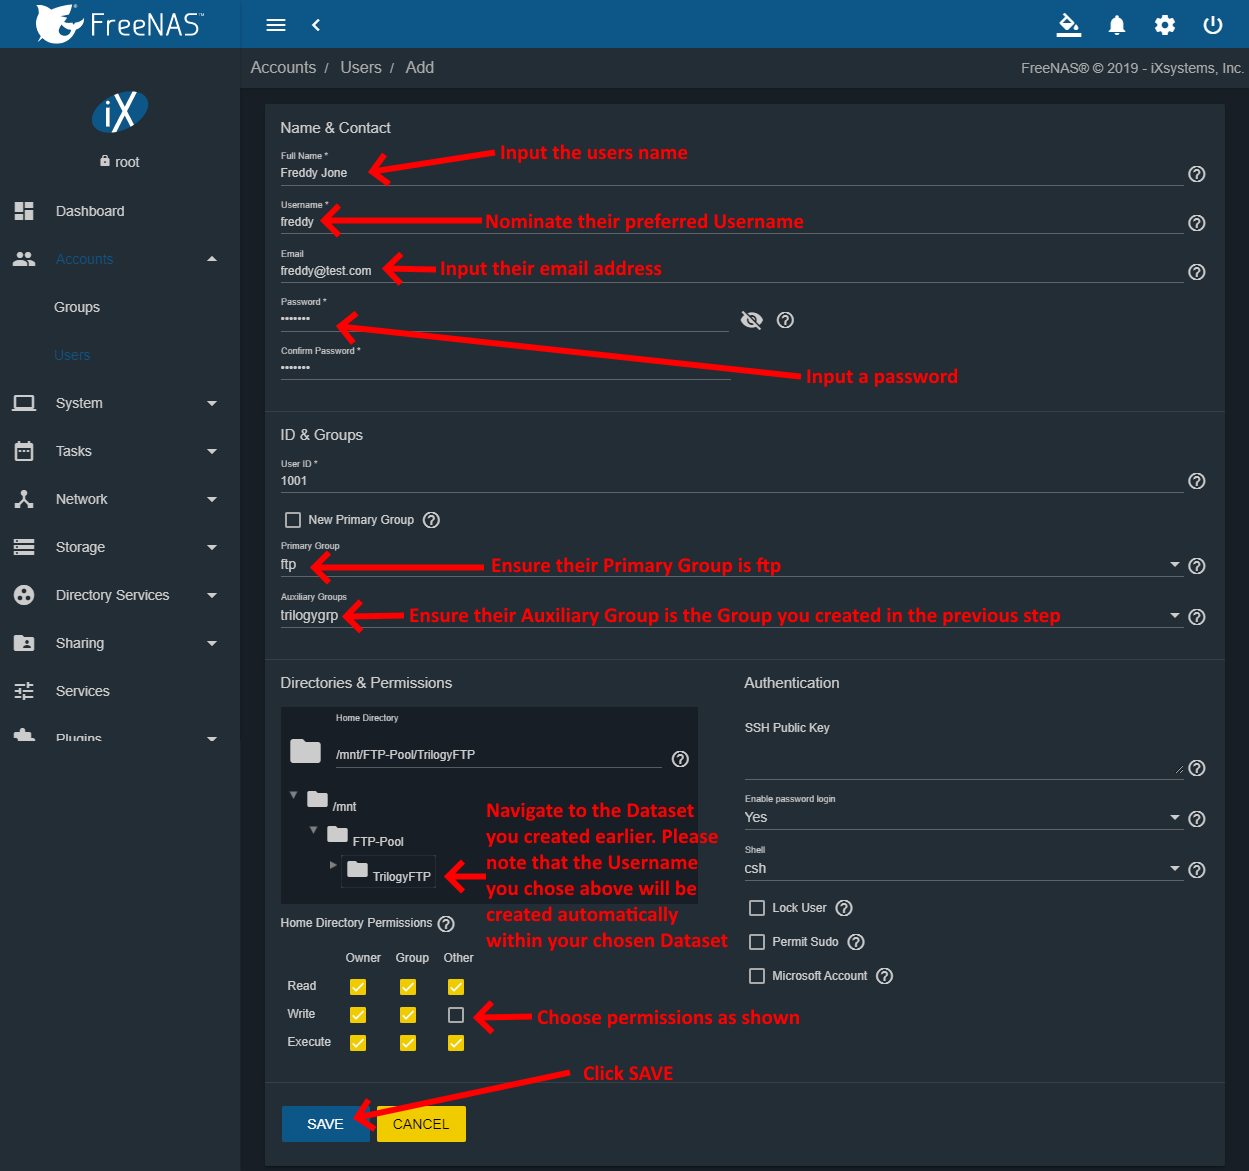
Now we're going to create a user account that will have access to your newly created Dataset. From your FreeNAS options menu on the left select Accounts > Users and click the ADD button located at the top of the screen. Follow the instructions below:
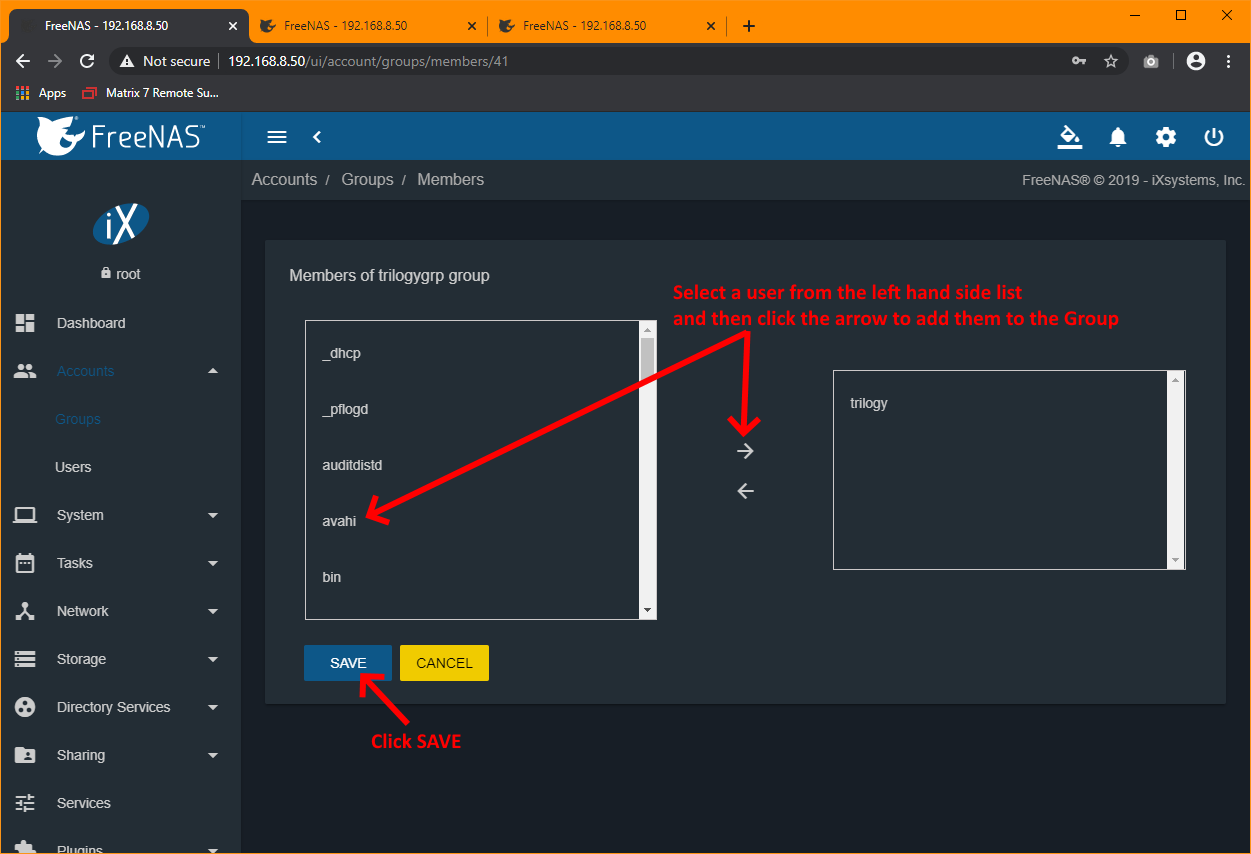
Don't forget to add the user we just created to the Group you created in the previous step. To do so From your FreeNAS options menu on the left select Accounts > Groups and follow the screenshots below:
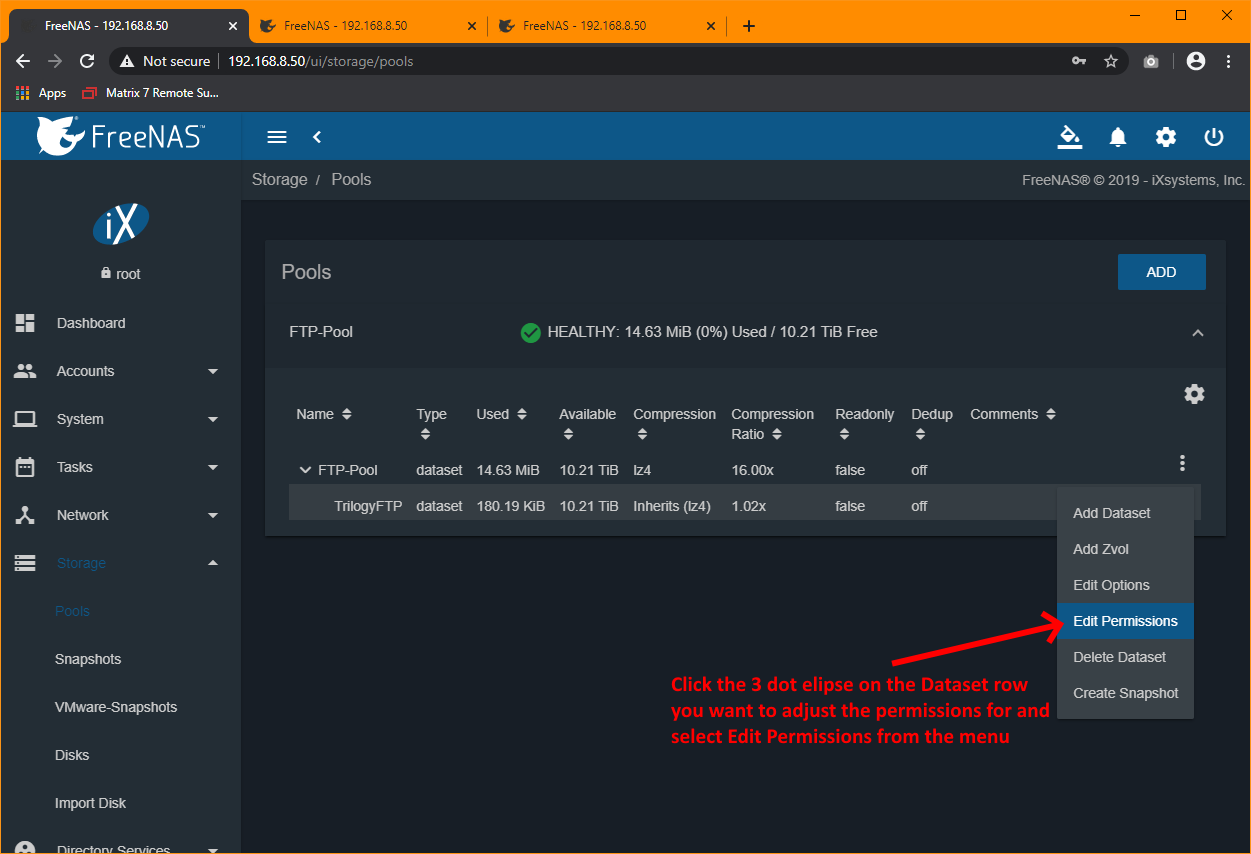
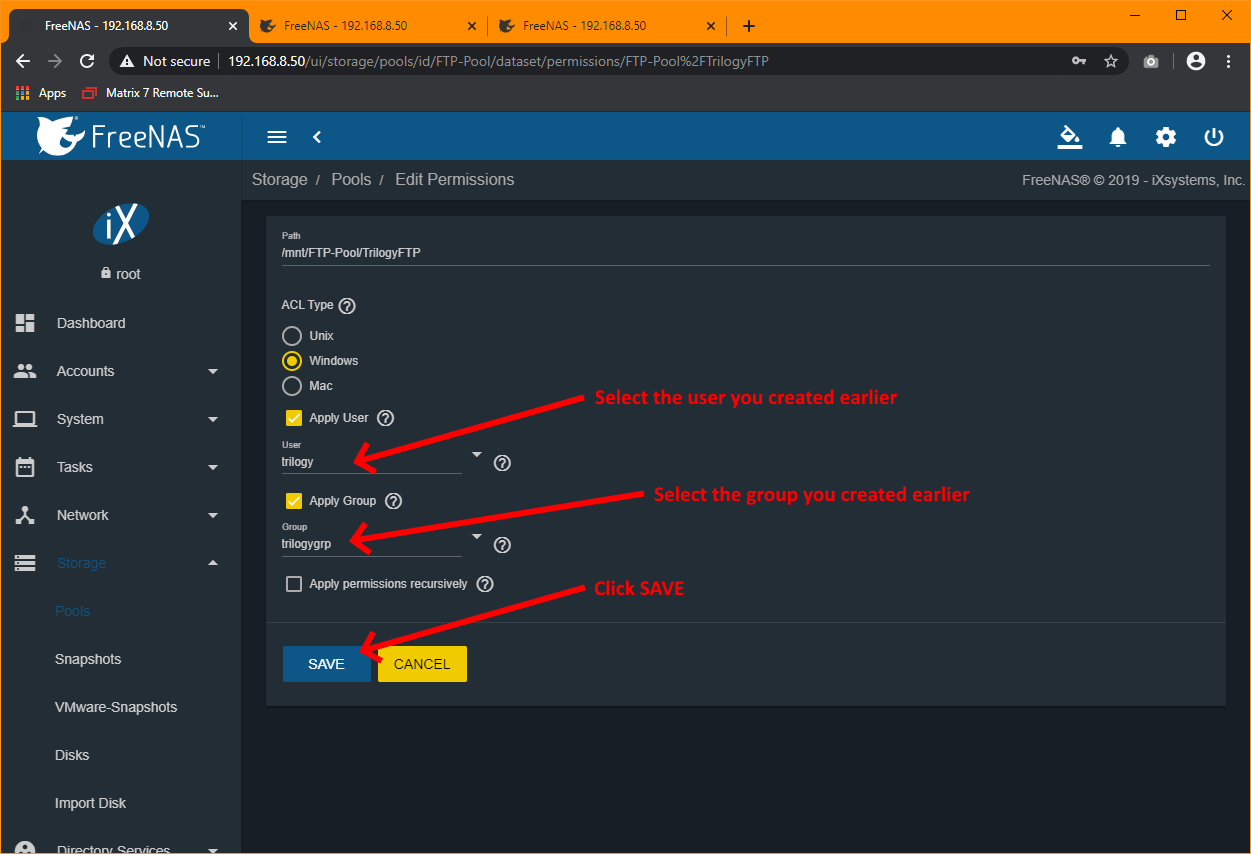
We're now going to change the permissions on the Dataset you created for the user so they have the rights to add and delete data. From your FreeNAS options menu on the left select Storage > Pools. Then expand the Pool that contains the Dataset we created earlier and follow the screenshots below:
The user is now ready to upload files to your FreeNAS FTP service. All we have to do now is start the FTP server and ensure we have a Port Forward rule setup on our firewall that send port 21 to our FreeNAS FTP server, which in my case is 192.168.8.50.
We can enable the FTP service from your FreeNAS options menu on the left. Select Services and you should see the following screen:
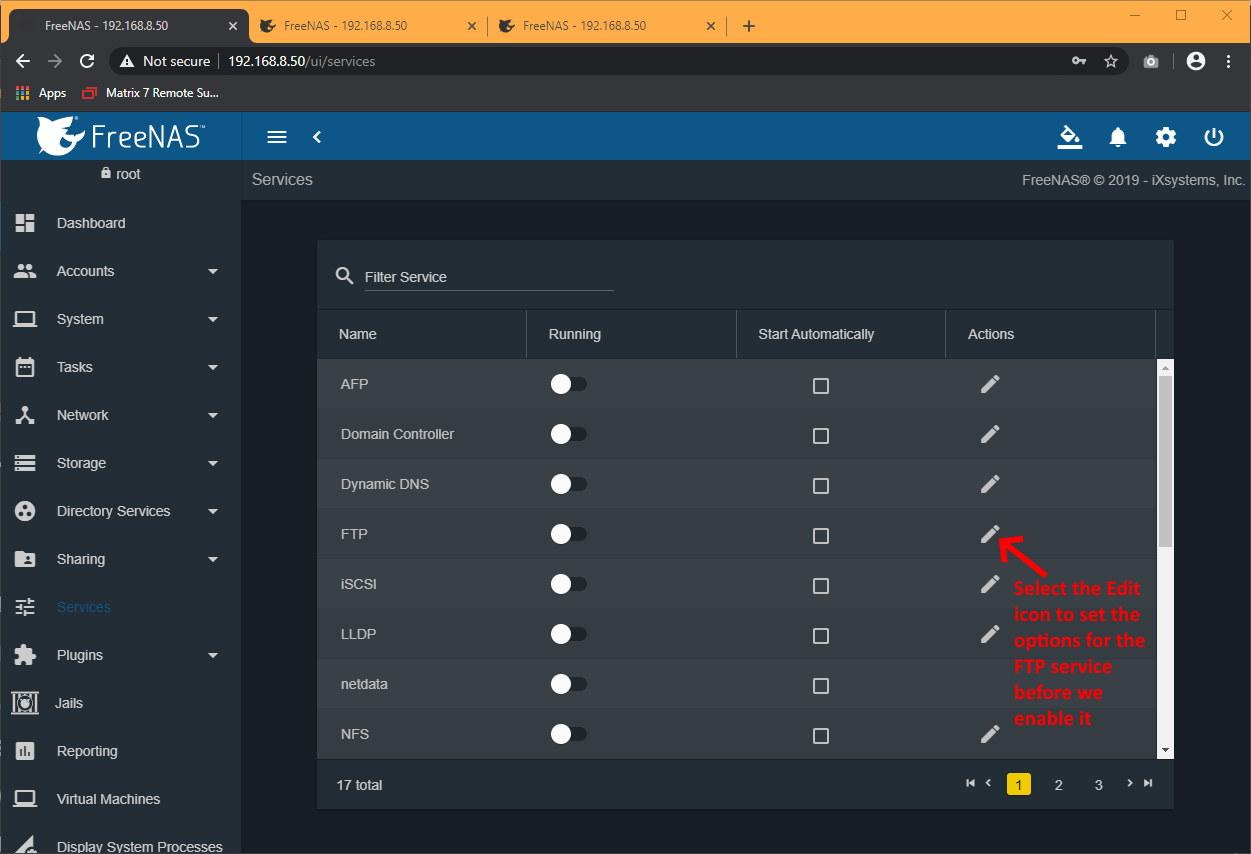
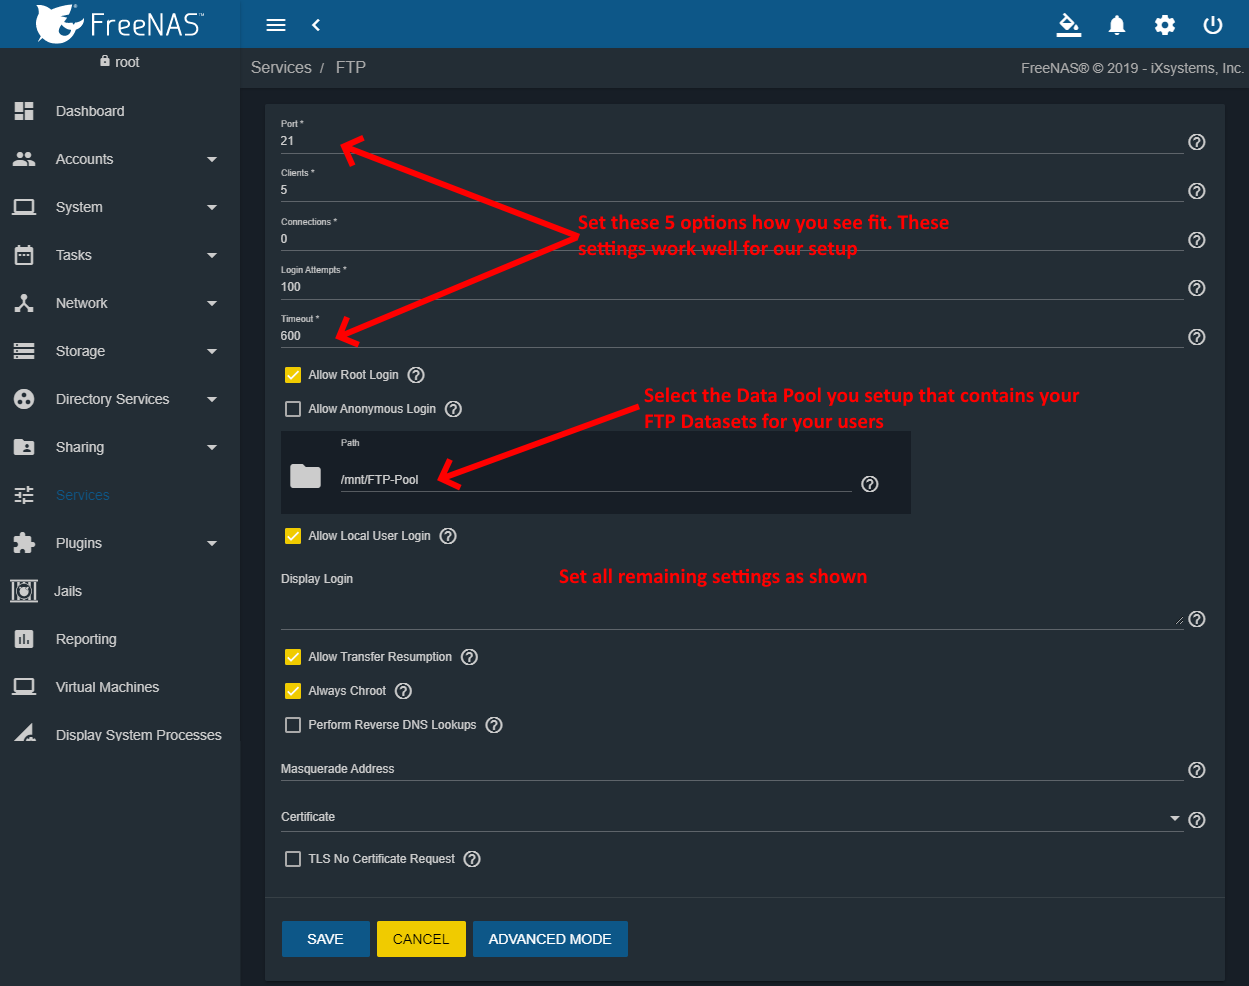
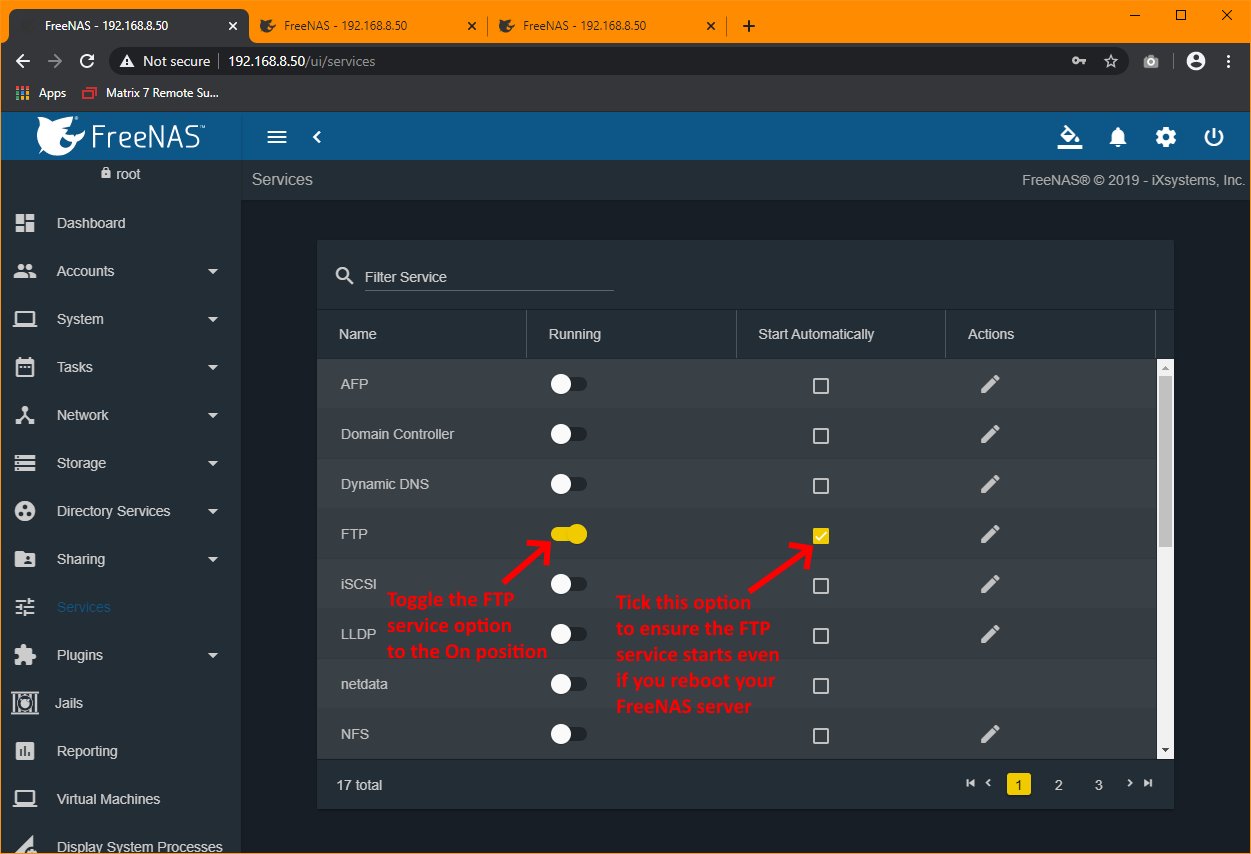
Now we're ready to enable the FTP Server. Click Service on your FreeNAS options menu on the left and follow the screenshot below:
You're now ready to start using your newly created FTP service. To test it out, download an FTP Client like Filezilla here and install it on your computer. Make sure you test it not only from within your LAN, but also from an external source to ensure that your clients can access it from a remote location.
Once again, to re-iterate the importance of locking down who has access to your server. It is of the utmost importance so as to not attract hackers that you ensure you have limited the IP addresses that are allow to use your FTP server to only your clients/trusted users and not open to anyone on the internet.
If you've found this useful, you may want to sign up to our newsletter where you'll receive notices on when we post new articles and helpful "how tos". Just fill out your details below and we'll do the rest...


