


Setting up a new PC to be enrolled in Intune during the Out of Box Experience (OOBE) is a bit convoluted, so I thought it would be good to document the process to save you the heartache we had the first time we needed to do this. This will enable the computer to be enrolled into Autopilot. This allows for streamlined deployment and configuration of Windows devices. Here's a detailed guide on how to set up a new PC into Intune during the OOBE setup:
Prerequisites:
- Ensure you have admin access to the Microsoft Intune admin center here...
- Intune requires an Azure AD Premium subscription like Enterprise Mobility + Security E5 for the admin and at least a Business Premium license for the end user. Your computers operating system will need to be Win 10 Pro or better. Home versions of Win 10 and Win 11 won't work with this setup as far as I'm aware.
- A USB Storage device.
- An internet connection.
Prepare the PC:
OOBE (Out Of Box Experience) is generated when you purchase a new PC or have formatted your current PC either from Windows Settings using the Reset This PC option or booting and reinstalling Windows from a USB stick.
The Procedure:
When your new computer or after you have formatted the device boots for the first time, you'll encounter the normal Select Your Region, Keyboard settings etc. During this process, we're going to run a few commands to generate CSV file so you can use that to import it into Intune.
The following example screenshots are for a Windows 10 setup, but will work for Windows 11 as well.
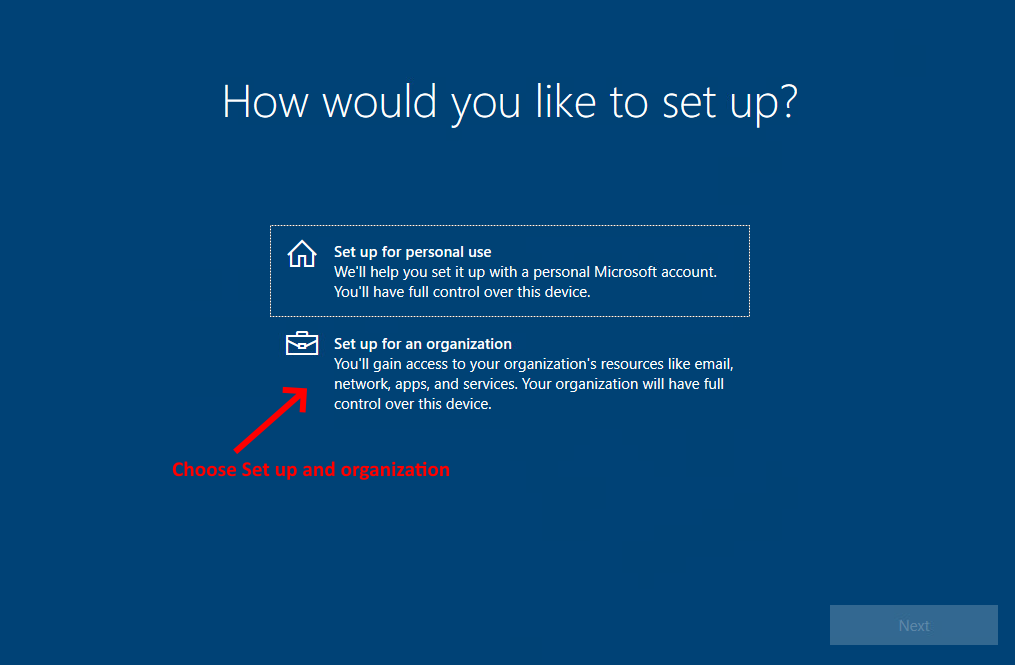
After you click Next you should see something like the following screen:
When you're at the the above screen hit Shift + F10 simultaneously on your keyboard to bring up the command prompt and you should see something like the screenshot below. Please ensure you have connected to a network with an internet connection because the subsequent commands won't work without one.
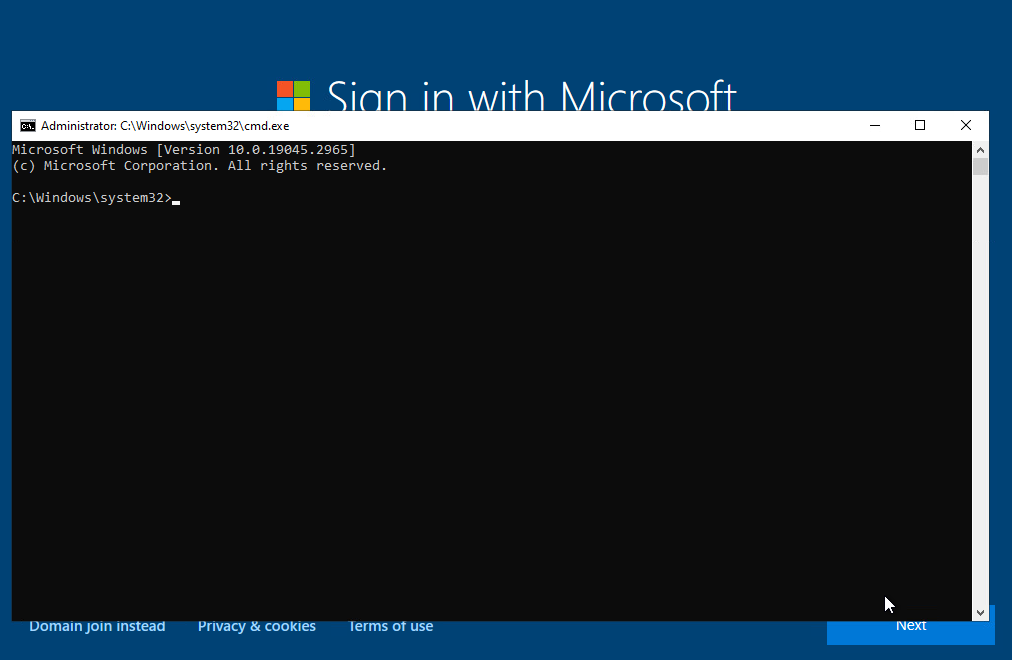
We're now going to generate the Intune CSV from the command prompt above. You need to type in the following commands:
PowerShell -NoProfile -ExecutionPolicy Unrestricted
Install-Script -Name Get-WindowsAutoPilotInfo
Get-WindowsAutopilotInfo -OutputFile C:\ComputerName-HWID.csv
After running the commands above you should have something like the following example:
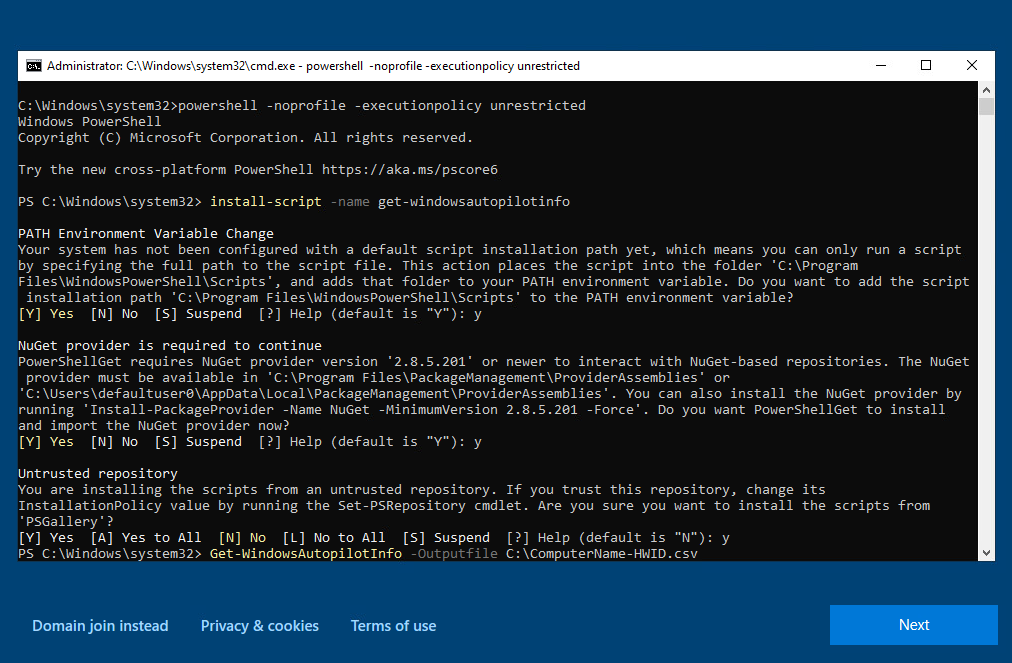
In the example above change the saving location and name to suit your requirements. I have simply saved the name ComputerName-HWID.csv file to the root of the C:\ drive, but you may want to save to a removable USB drive, so change the syntax to suit.
Uploading the CSV File into Intune:
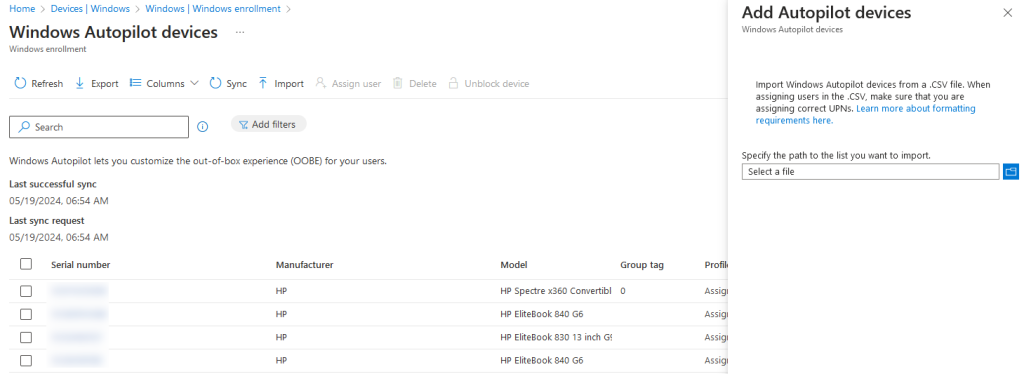
Access the Microsoft Endpoint Manager admin center here... Once in the admin center, go to Devices -> Windows -> Windows enrollment -> Devices. Now click on Import and select the CSV file you created earlier in this tutorial. See screenshot below:
Verify Device Registration:
Once the CSV file is uploaded, verify that the devices appear in the list of imported devices. This indicates successful registration.
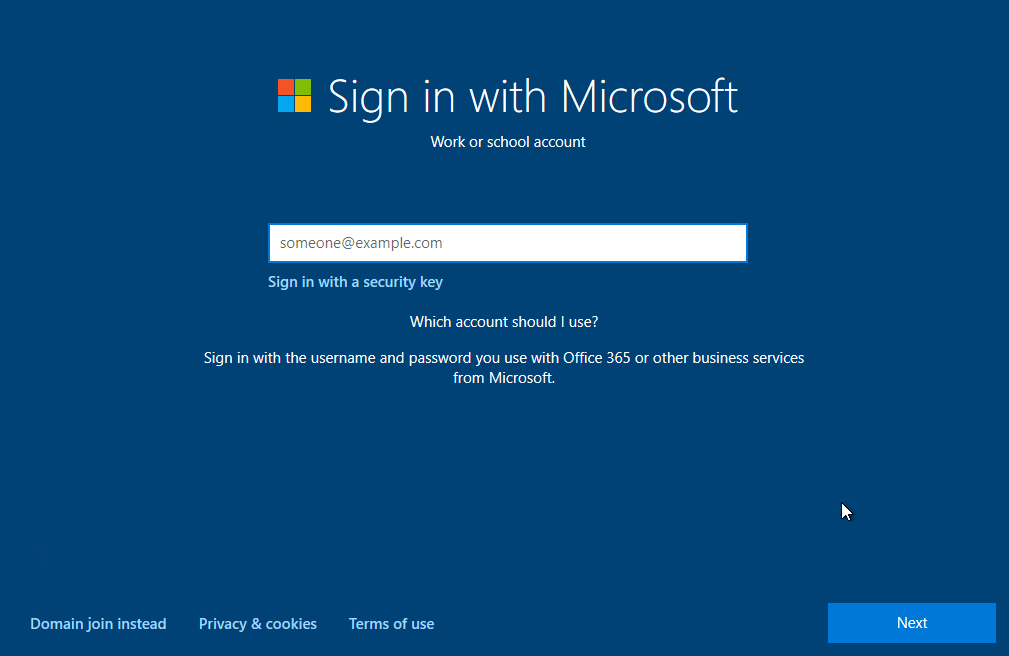
Once the device shows up successfully in the imported devices, you can now go back to your OOBE computer setup screen and complete the registration of the Work or School account like the following screenshot:
Perform testing to ensure that all required applications are installed, settings are applied correctly, and the device behaves as expected.
By following these steps, you can set up a new PC to be enrolled in Intune during the OOBE setup using Autopilot. This allows for a smooth and streamlined deployment process, reducing the need for manual intervention and ensuring consistency across devices.
If you've found this useful, you may want to sign up to our newsletter where you'll receive notices on when we post new articles and helpful "how tos". Just fill out your details below and we'll do the rest…


