


Setting up an equipment mailbox can be an essential step for businesses, organizations, and institutions that rely on shared resources. An equipment mailbox provides a way for users to reserve equipment and ensure that it is available when they need it.
Today, I will show you step-by-step instructions on how to set up an equipment mailbox and show the organizer of the meeting and show subject in the calendar when the resource is booked.
Step 1: Create the Equipment Mailbox
The first step in setting up an equipment mailbox is to create the mailbox itself. This can be done using the Exchange Management Console in Microsoft Exchange Server or the Exchange Admin Center in Office 365 here...
To create the equipment mailbox, follow these steps:
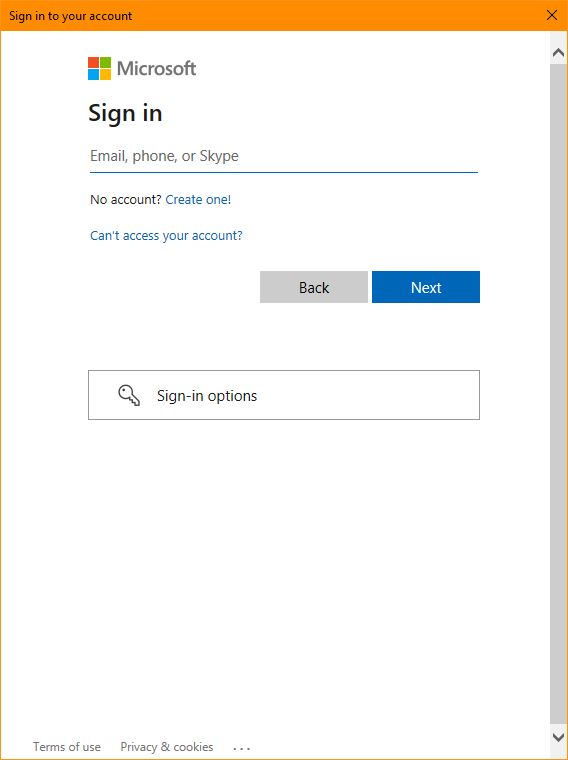
- Once you've logged onto the Exchange Admin Center using your admin credentials
- Expand to the Recipients section
- Click on the Resources option
- Click on the New (+) Add a new equipment resource option.
- Enter a name for the equipment mailbox and nominate a unique email address and click Next
- Enter the Set Properties for the resource to suit your needs and click Next
- Complete the Booking delegate settings and click Next
- Review the resource settings you've created and click Create once you're happy with the settings
Step 2: Usage of the Equipment Mailbox
After creating the equipment mailbox, the next step is to test the usage. Using the setup process above i created a test Resource call cheeseboard and we'll use that for the example usage from this point forward.
Open Outlook on your computer and click the Calendar icon. Once your calendar presents itself, follow the screenshots below:
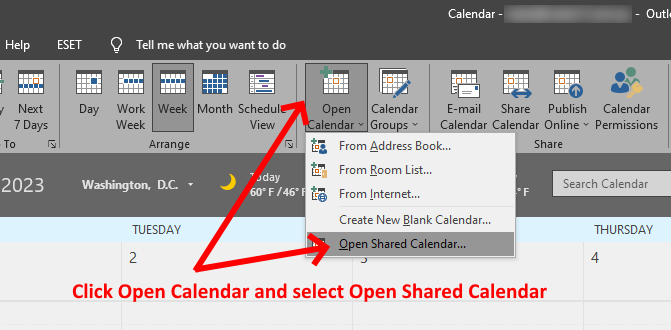
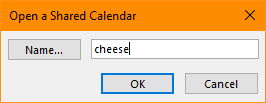
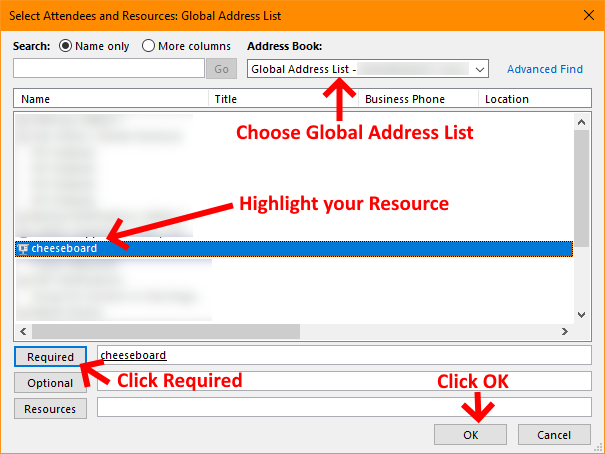
Now type in the name of your Resource Calendar and click OK like the example below:
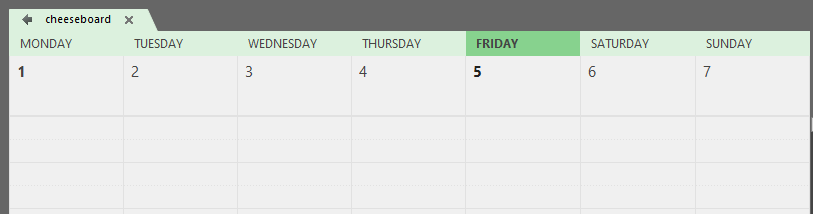
You should now see an additional calendar shown in your calendar screens like so:
Now if you you were to try and directly click into the resource calendar to try and schedule a time slot, you would receive the following error:

This is because this is not the correct method of scheduling a resource. This is by design and prevents users from removing other users scheduled times and restricts malicious deletion. The correct method is outlined in the steps below:
Ensure your personal calendar has the focus by clicking the tab with your email address as the label. The follow the steps below:


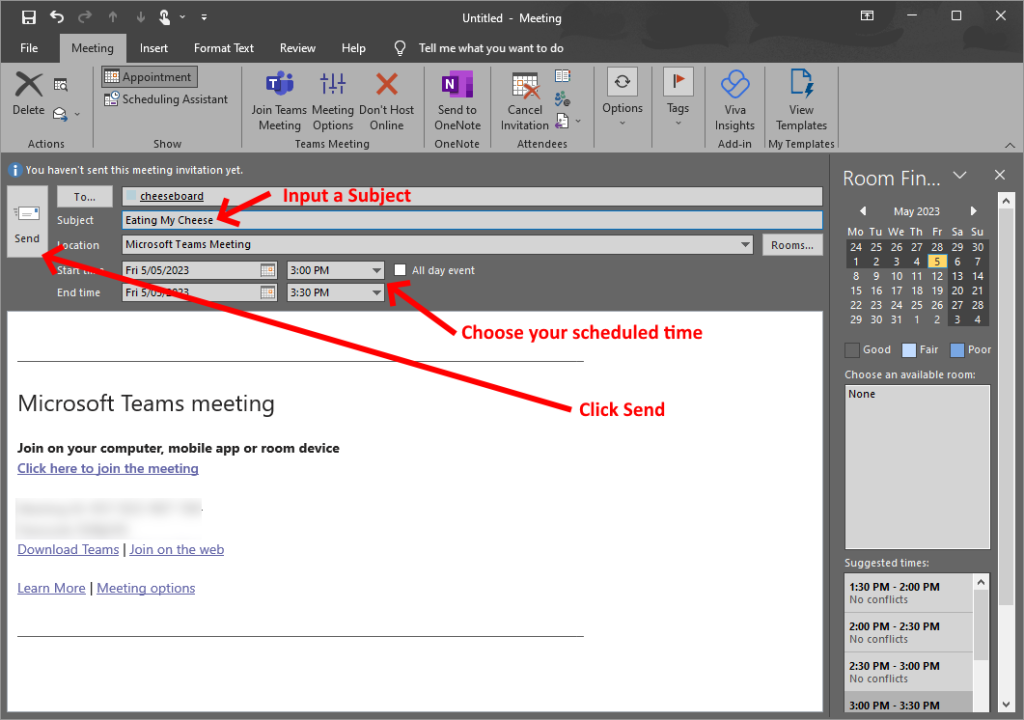
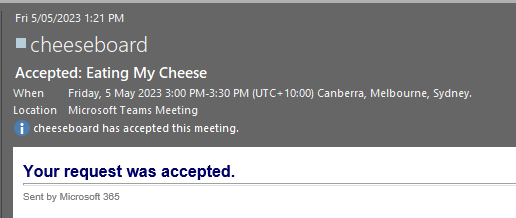
Once you've clicked Send you should receive a confirmation email saying Your request was accepted if it doesn't conflict with an existing booking. See example email below:
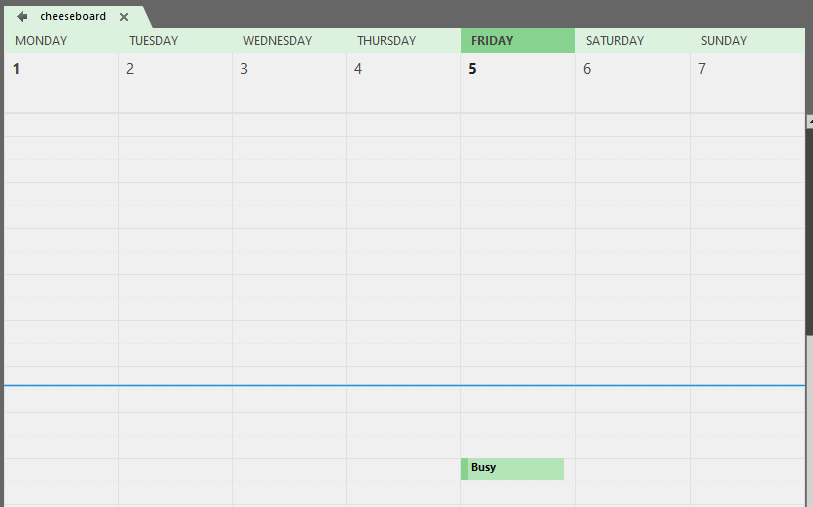
Finally, if you go back to your calendar you should now see your scheduled calendar entry in the resource calendar. Here is the example calendar I created for this article showing the reservation of the resource at the nominated time:
That's it, your setup of the Resource Mailbox is complete and operating as expected.
Finally, we're going to setup extended detail for the Calendar entry of the Cheeseboard calendar. This means instead of just showing "Busy" like the screenshot above, each user will be shown more detail of who booked the resource and the times it is booked. We're going to use PowerShell to carry out this change so ensure your have your Office 365 admin credentials ready. Let's proceed...
Open a PowerShell instance as Administrator and follow the steps outlined below…
First we need to ensure that you have the Exchange Online Management installed so you can connect to Online Exchange via PowerShell by running the following:
Import-Module ExchangeOnlineManagement
Once that's complete, we're going to connect to Exchange Online using and account that has the necessary permissions to connect remotely via PowerShell Exchange. You can find out how to allow your admin account to use Exchange Online via PowerShell here… Use the following command:
Connect-ExchangeOnline -UserPrincipalName [email protected]
Change the UserPrincipalName [email protected] with your O365 admin account. You should receive a pop screen asking you to logon to your O365 account like so:
Once you've successfully logged on, we can now run the PowerShell commands to expand the resource calendar detail. Simply change [email protected] with your resource email address in the commands below:
Set-MailboxFolderPermission -Identity "[email protected]:\Calendar" -User default -AccessRights LimitedDetails
Set-CalendarProcessing -Identity "[email protected]" -AddOrganizerToSubject $True -DeleteComments $False -DeleteSubject $False
If you've found this useful, you may want to sign up to our newsletter where you'll receive notices on when we post new articles and helpful "how tos". Just fill out your details below and we'll do the rest…


