


Today I'm going to show you how to create a VLAN on a HP ProCurve 1810G-24 with a Trunk Port to a MikroTik 750G r3 to carry two separate VLANs. This may seem like a pretty simple exercise, but this is a little weird with this particular setup so is worthwhile documenting. Let's start...
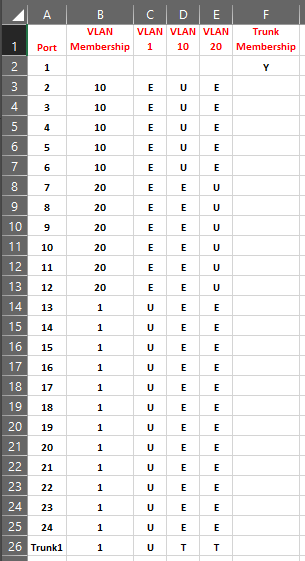
Below is a spreadsheet screenshot to outline how we're going to configure the HP switch and show which ports are allocated to which VLAN, which port is allocated as the Trunk and how each port is tagged.
To say the actual UI for this particular switch is horrible, doesn't do the word "horrible" justice, but hey, I'm not here to judge.
Before we continue, I'm making the assumption that you have an operational MikroTik router and can log onto your HP 1810G switch to administer the switch.
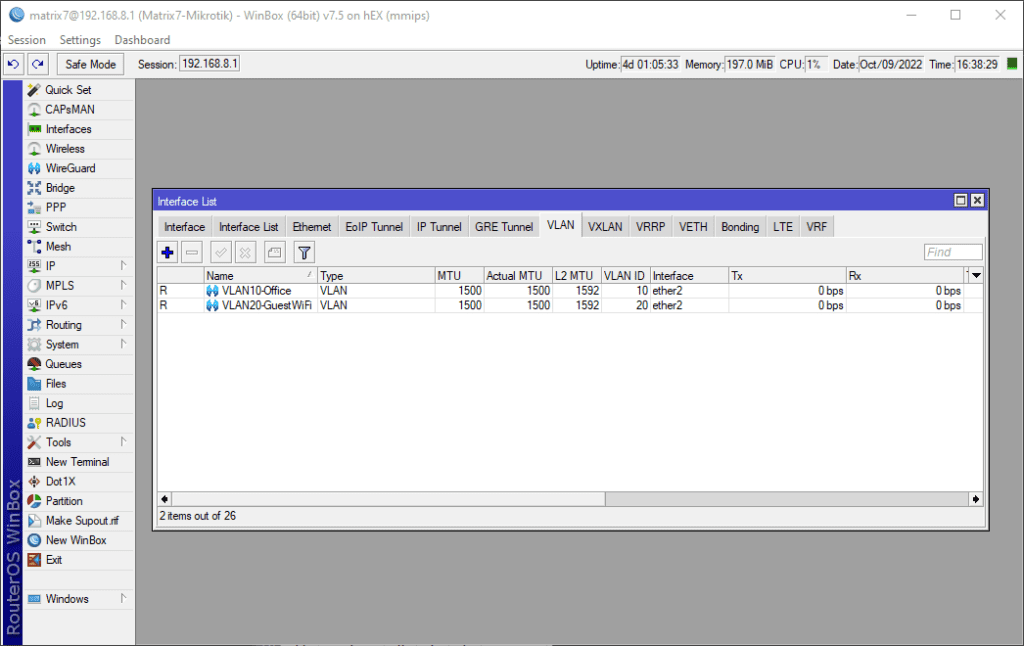
First we'll configure VLANs 10 and 20 on the Mikrotik allocate both VLANs to Ether2. Open Winbox and log onto your MikroTik router and click Interfaces and select the VLAN tab. Then setup your VLANs as outlined in the screenshot below: (Change the values to suit your environment. For example, you may want to use Ether5 and VLANs 150 and 220)
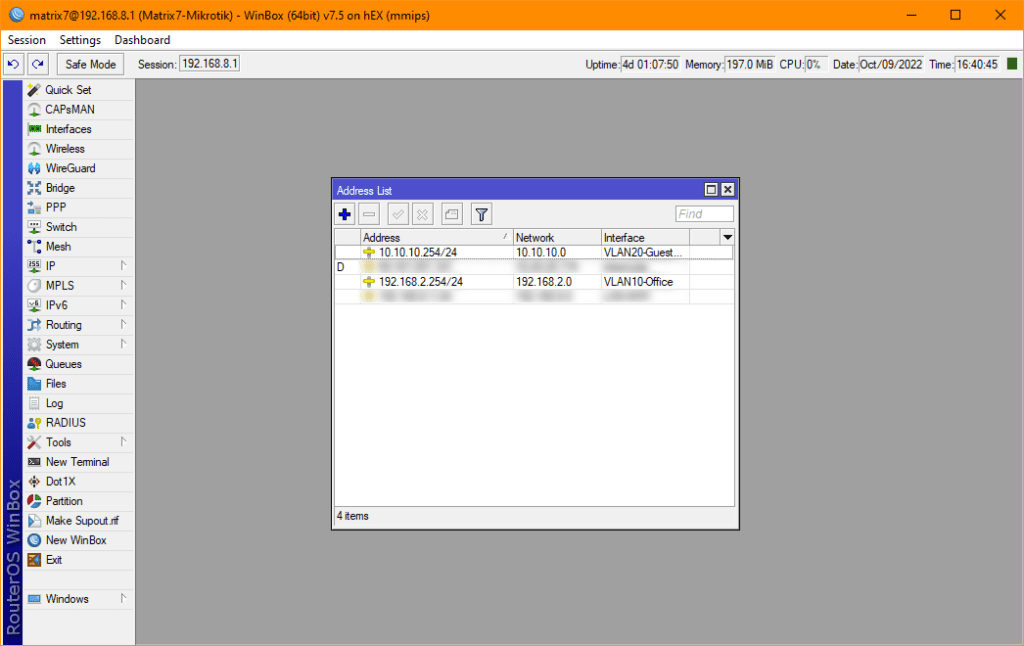
Now we're going to allocate IP subnets to both the VLANs we created in the previous step. Click IP > Address within Winbox. Here is the screenshot of my environment, but change it suit your needs:
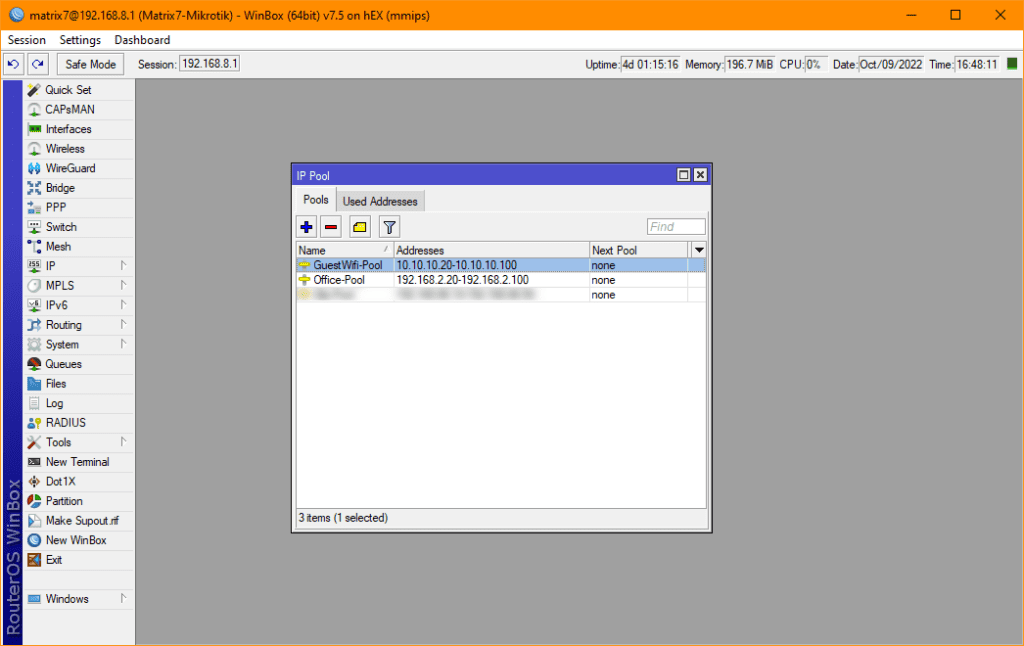
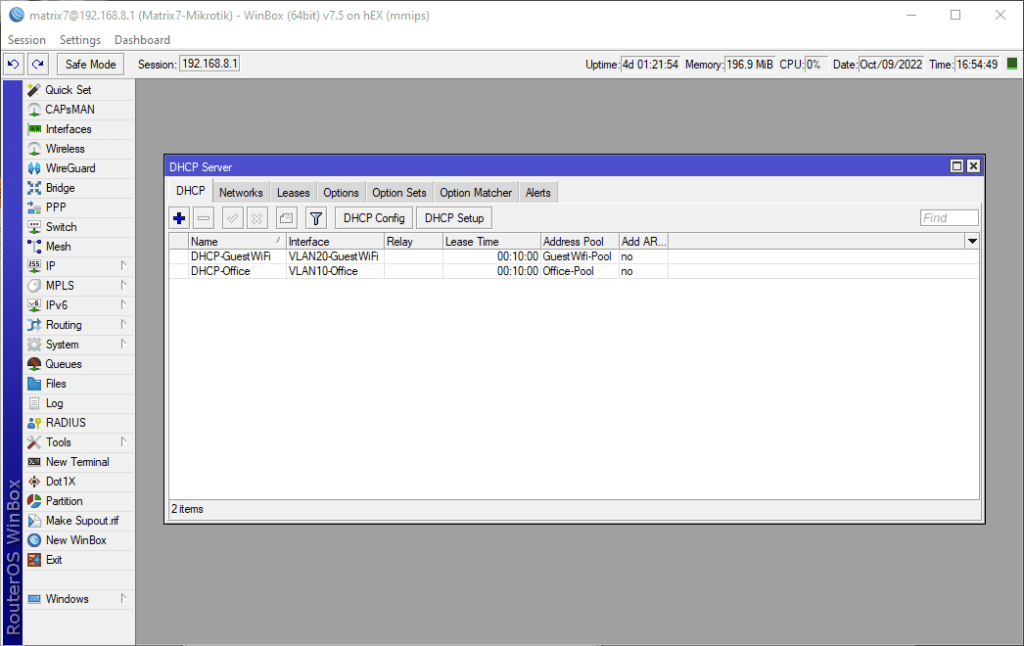
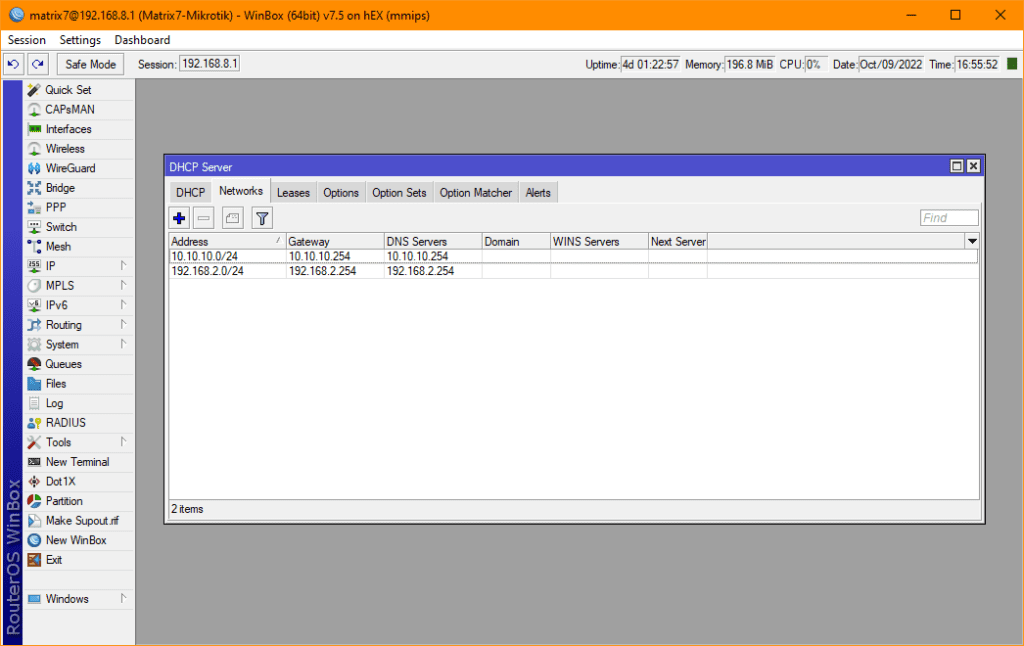
Now create your DHCP Server instances for both subnets from within Winbox by clicking IP > DHCP Server. See screenshots below:
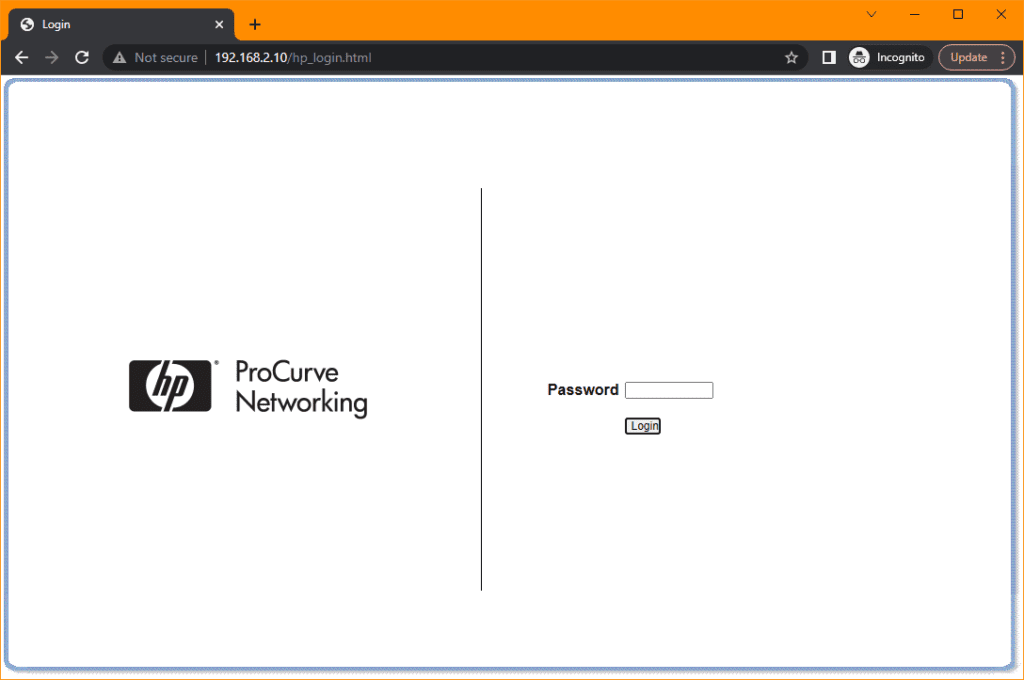
That's it for the MikroTik portion of the configuration. We're now going to go and log onto our HP 1810G-24 Switch and complete the setup for it to handle our newly created MikrotTik VLANs. Plug your computer into Port 24 of the switch so we can manage the device while we make these changes. We'll change the management port at the end, but to start we'll use Port 24. First, log onto your HP switch. The default IP is 192.168.2.10, but yours may be different.
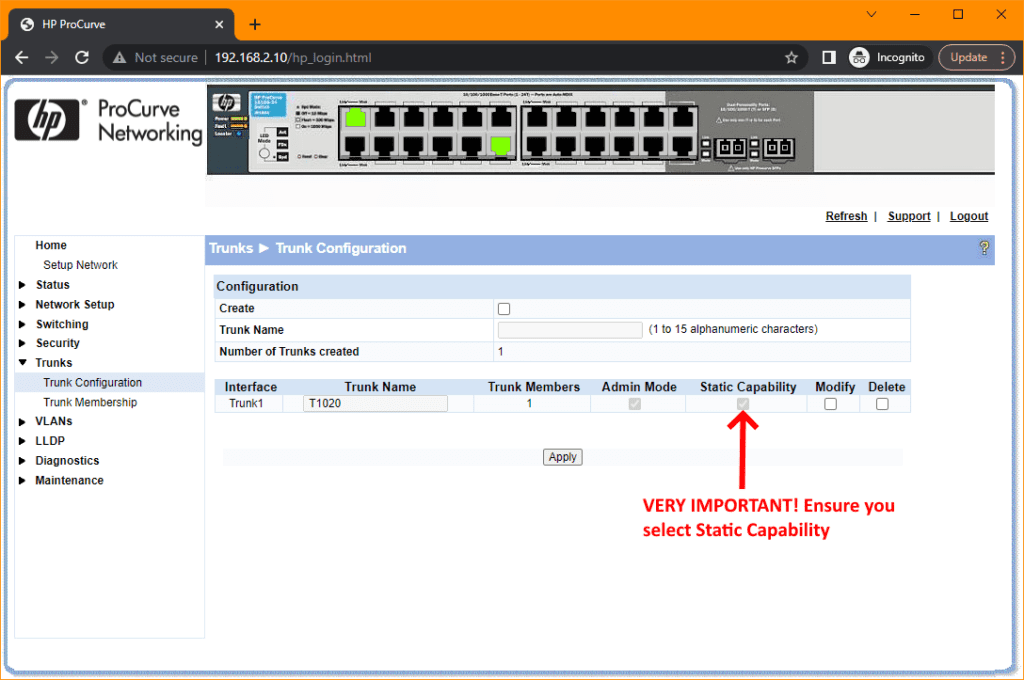
First we need to create our Trunk. One of the most important aspects of this setup is that you need to Modify the Trunk after you've initially set it up and ensure your selected the option Static Capability. When I was setting this thing up, every time I nominated the Trunk to my preferred port without the Static Capability setting, it wouldn't work and prevent me connecting to the device. You can read more about this setting here... It took me ages to figure out why so take heed in this warning. VERY IMPORTANT!
See the screenshot below how I created mine, but you can change it suit.
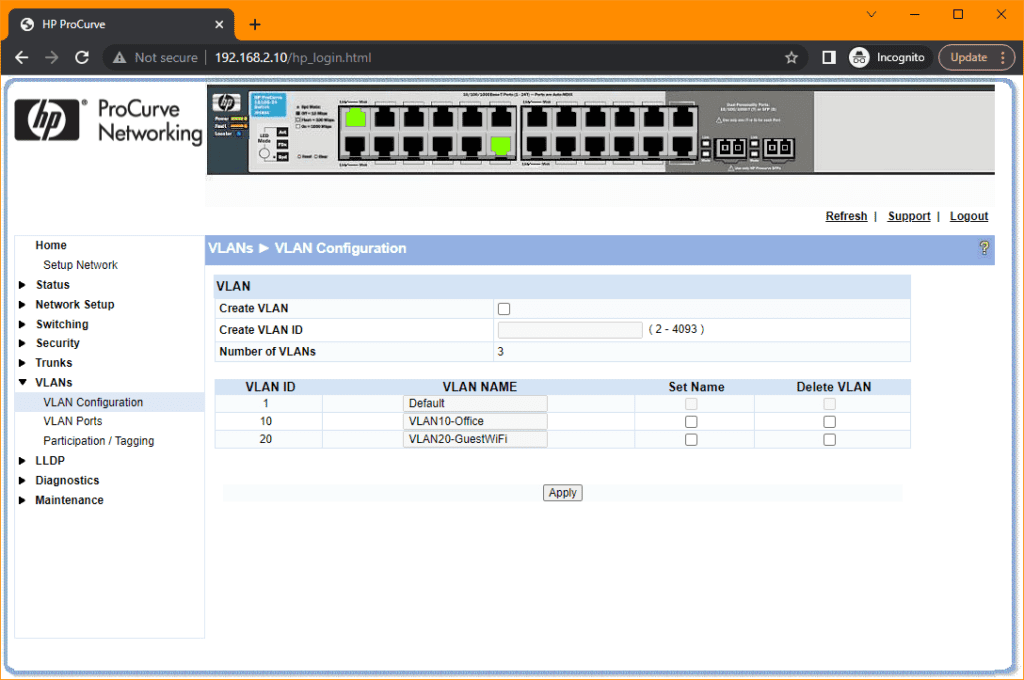
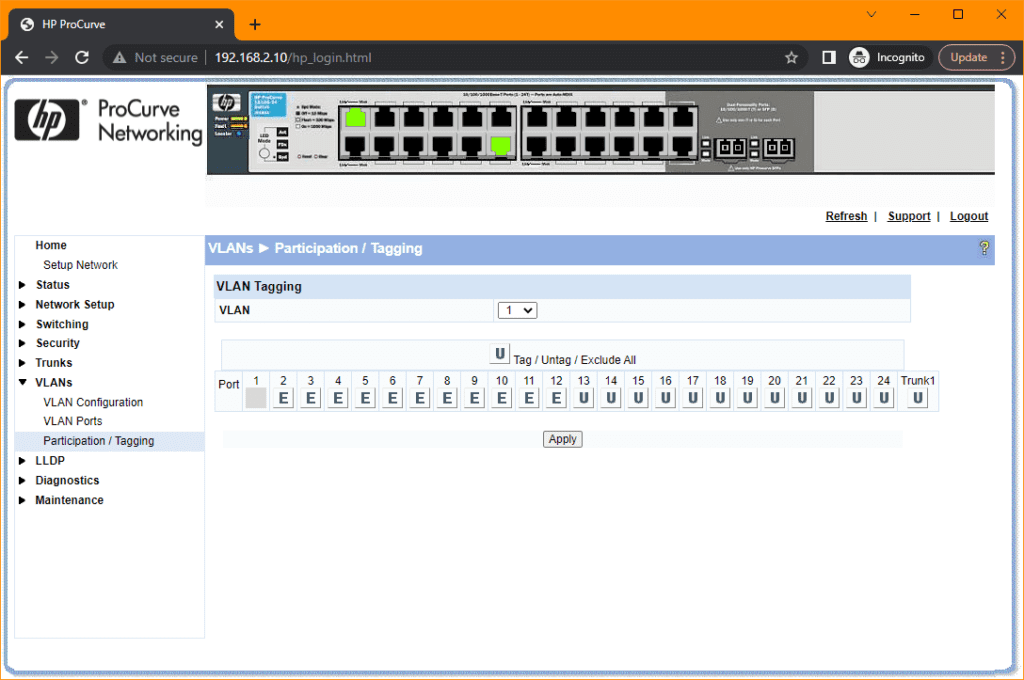
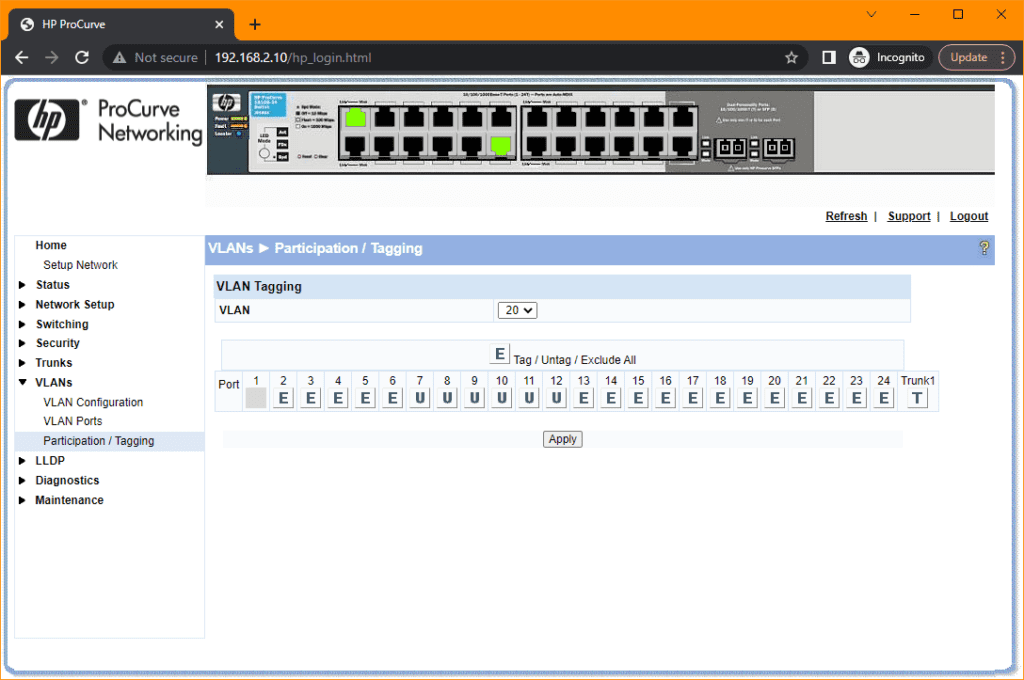
Now we're going to set up out VLANs to as outlined in the spreadsheet screenshot at the beginning of this tutorial. See the screenshots below:

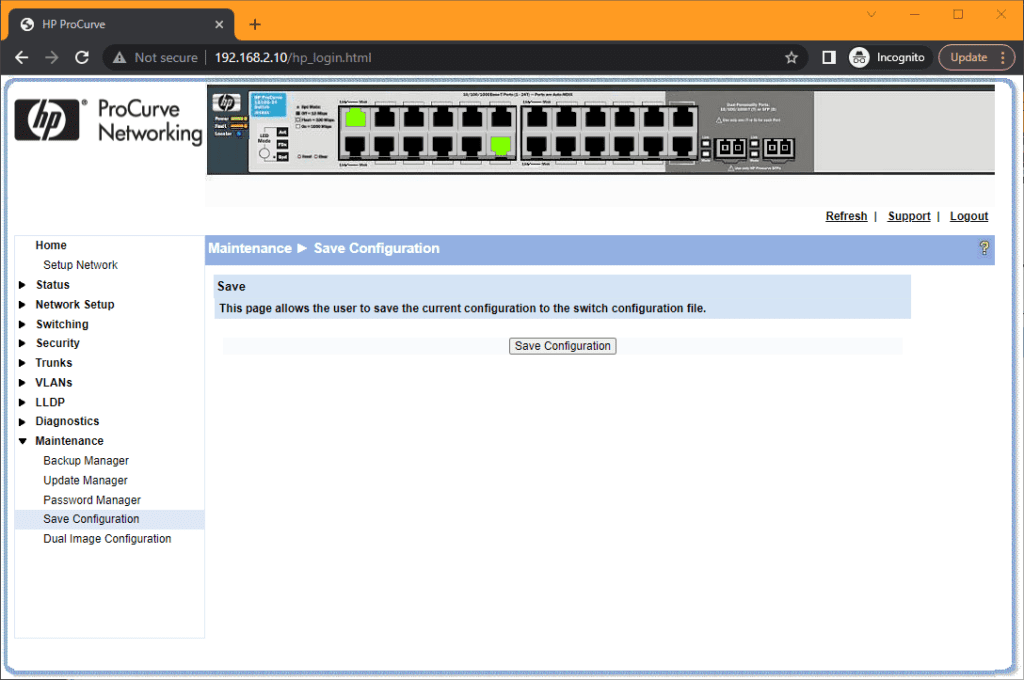
That's it, the VLAN configuration of the HP Switch is complete. Now you need to save the configuration:
Finally, we're going to change the Management Access to the switch to our preferred VLAN, in my case VLAN 10. Once again, change to suit your environment:
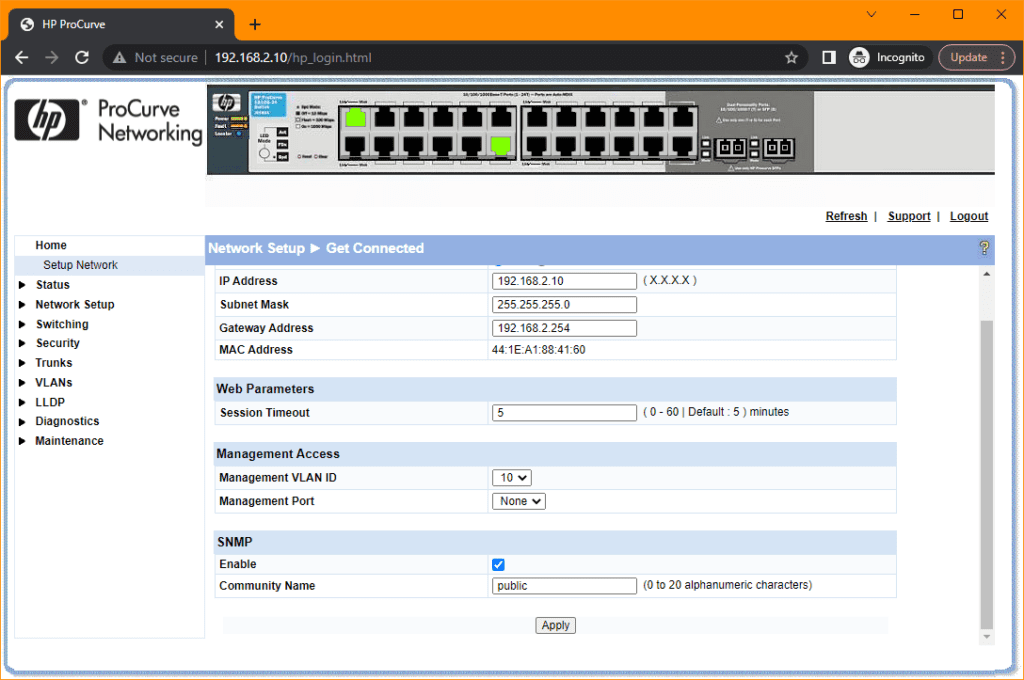
Click Apply and once again ensure you save the configuration.
OK, now we're ready to test our setup and see if it does what it supposed to do. So, what is it supposed to do you ask? Essentially we've created two Networks here that are segregated for security purposes to prevent the Guest WiFi being able to traverse onto the Office network.
The following is based on the setup I've created above, so bear in mind yours will probably be different. Plug the MikroTik Ether2 to Port 1 on the switch. This the port we originally nominated as the Trunk port to carry the two VLANs.
Now plug in your computer into any port between 2 and 6 and the computer should receive an IP from the Office DHCP subnet 192.168.2.0/24. Secondly, plug your computer into any port between 7 and 12 and the computer should receive an IP from the Guest WiFi DHCP subnet 10.10.10.0/24.
Your task is complete. Consider yourself a Super Star!
If you've found this useful, you may want to sign up to our newsletter where you'll receive notices on when we post new articles and helpful "how tos". Just fill out your details below and we'll do the rest…


