


If you're working with ESXi without access to vCenter, you can still move a virtual machine from one datastore to another using the ESXi host's web interface (ESXi Embedded Host Client). Here's a step-by-step guide for that scenario:
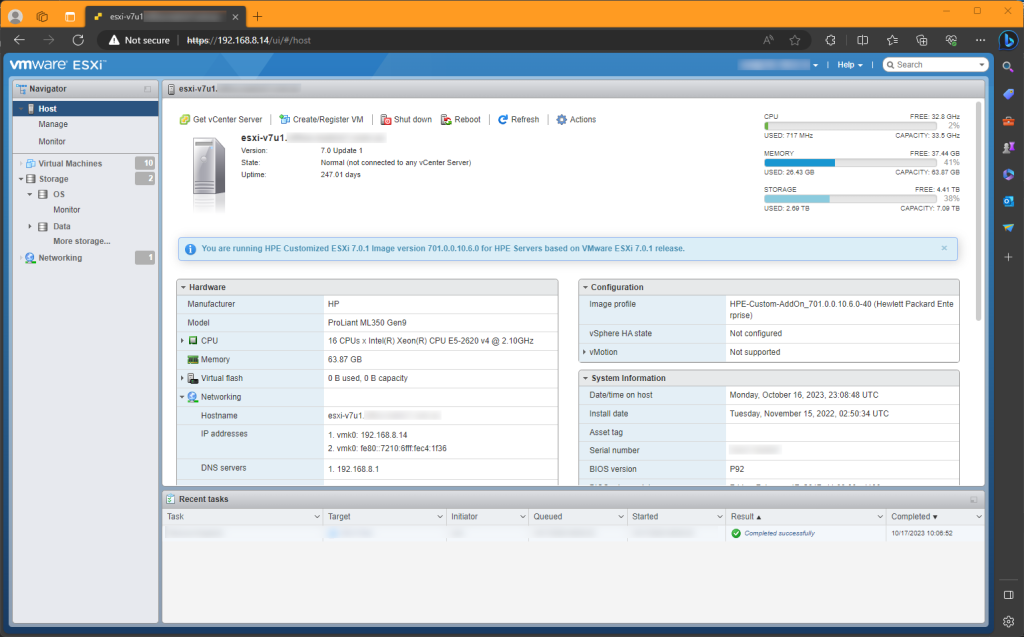
Step 1: Access the ESXi Host
Open a web browser and enter the IP address or hostname of your ESXi host and log in with the appropriate credentials. You should see something like the following screen:
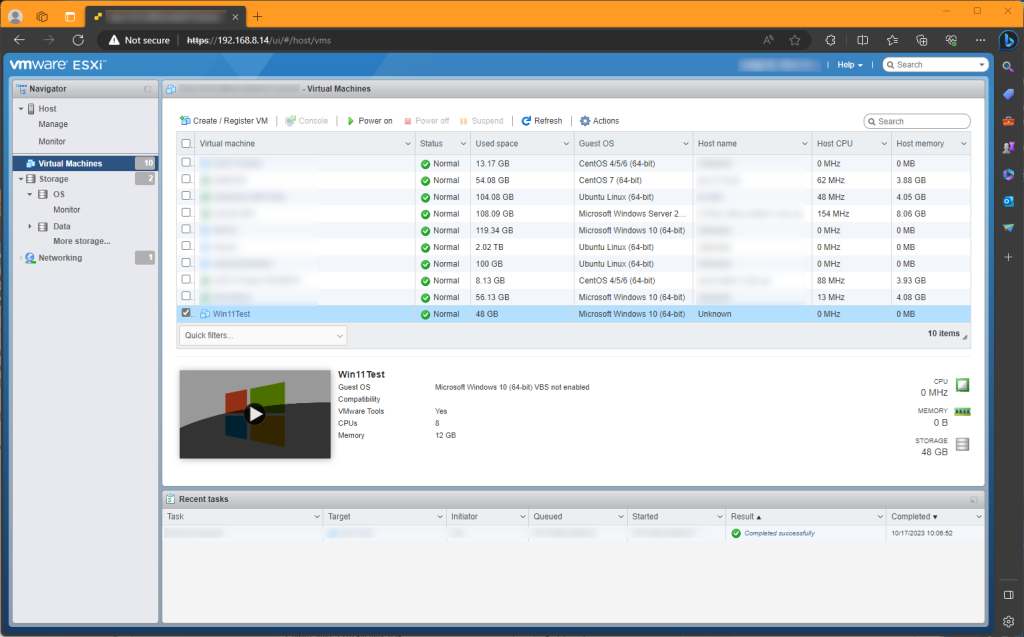
Step 2: Locate the Virtual Machine
In the ESXi web interface, select your click on Virtual Machines and find the VM you want to migrate. Ensure the VM is powered off before doing anything like the following example:
Step 3: Unregister the VM
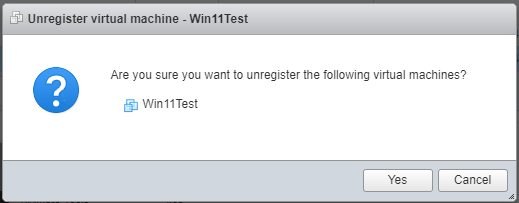
Right-click on the VM you want to move and select Unregister from the menu as outlined here:
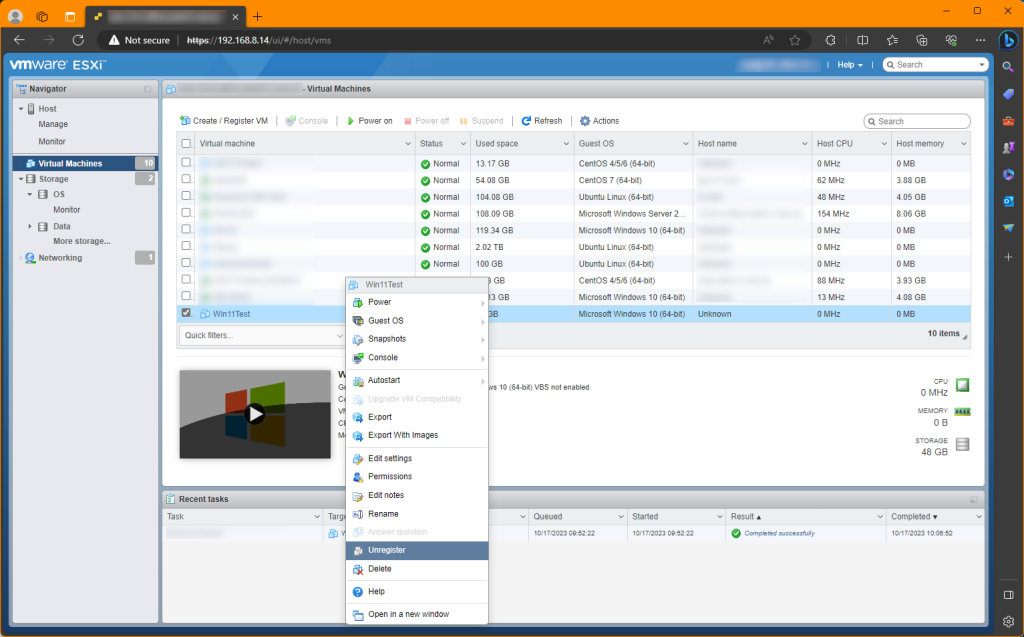
When prompted to unregister the VM, select Yes:
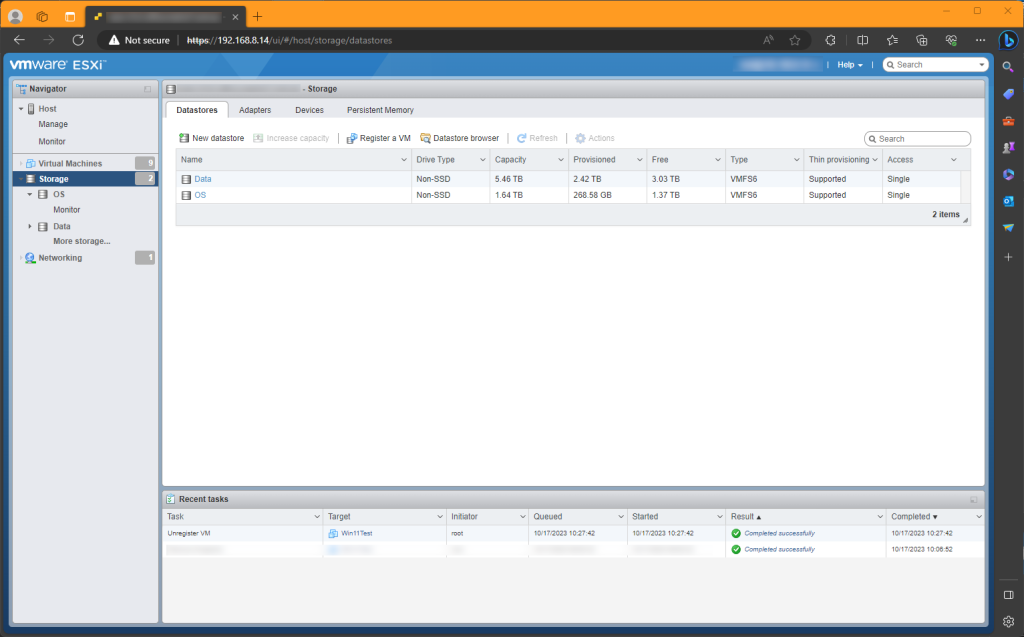
Step 4: Browse Datastores
In the ESXi web interface, click on the "Storage" tab. You should see something like the following screenshot:
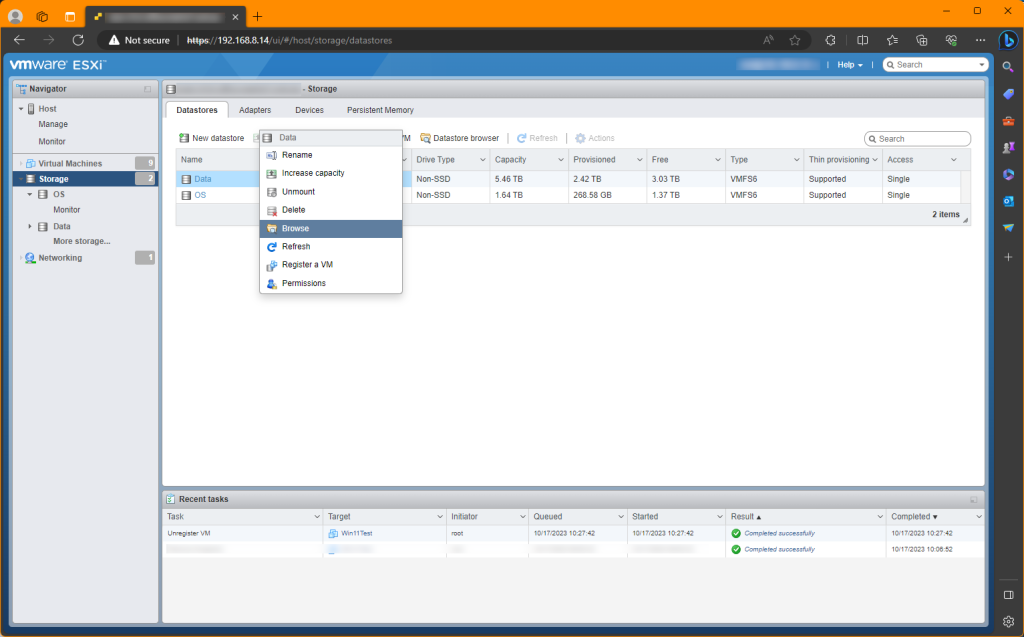
Step 5: Browse the Source Datastore
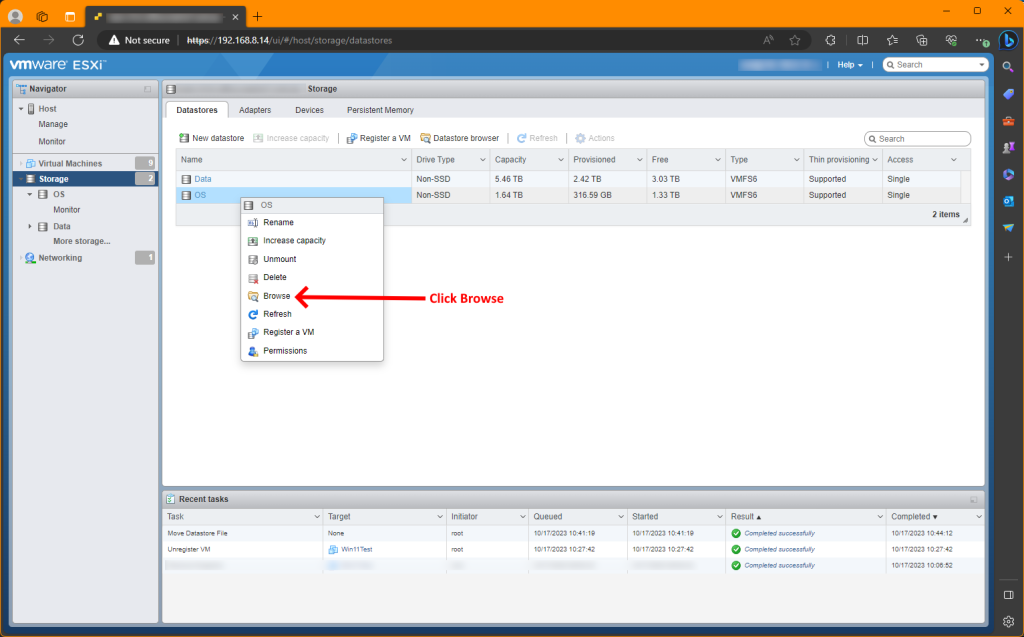
In the "Storage" tab, select the source datastore where the VM is currently located. Right cl;ick the datastore and select Browse like the following example:
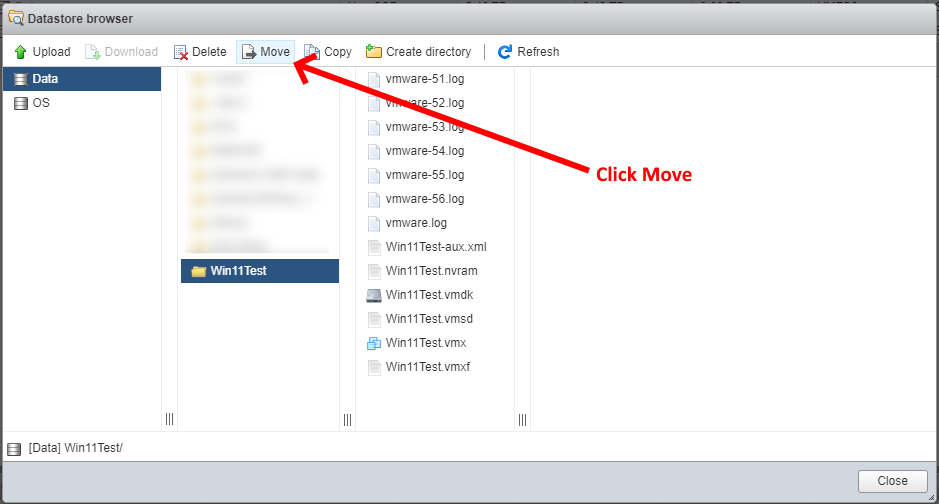
Step 6: Browse the Source VM Folder
Locate the VM's folder on the source datastore. This folder usually has the same name as the VM. Right-click on the VM folder and choose either "Move" or "Copy" depending on whether you want to move or copy the VM to the new datastore. If you just want to move it, follow the screenshot below:
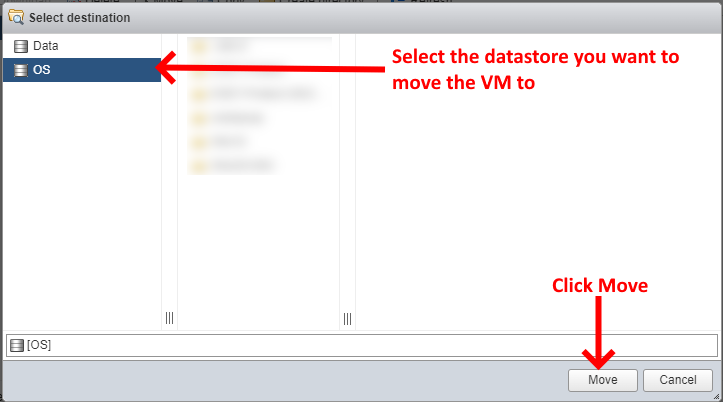
Select the target datastore where you want to move or copy the VM to:
Step 7: Monitor the Progress
The data transfer process will begin, and you can monitor its progress in the ESXi web interface:

Step 8: Re-register the VM
Once the VM is successfully moved or copied to the new datastore, right click on the datastore the VM was moved to, and select Browse like the following example:
Step 9: Register the VM
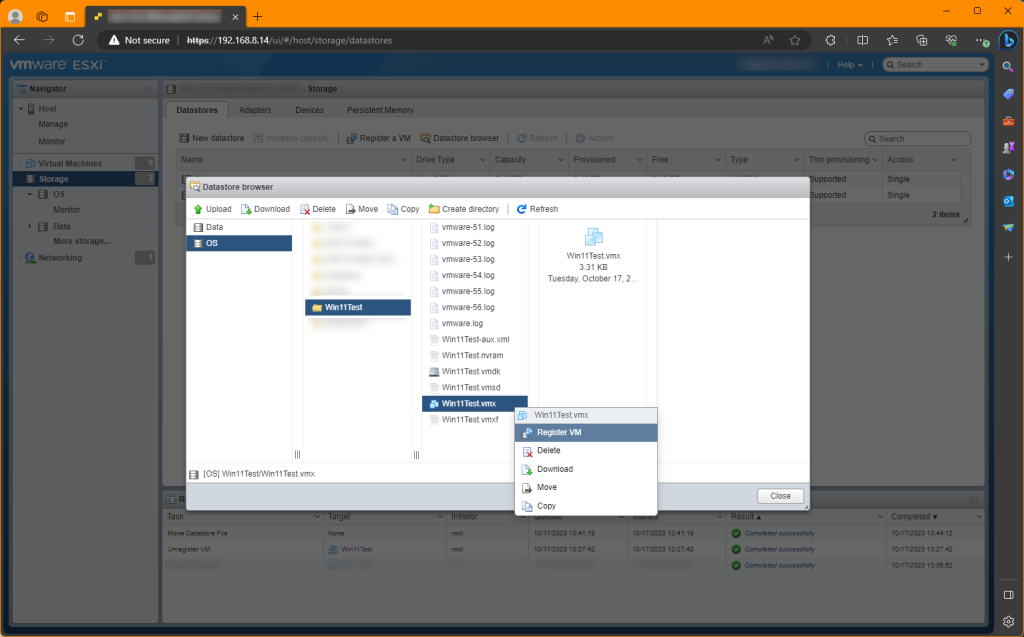
In the list files associated with the VM, find the file with the .vmx extension. The right-click on the file and select Register VM like the following example:
Step 10: Power On the VM
After re-registering, power on the VM from the ESXi web interface to ensure it's operating as expected.
Step 11: Verify Operation
Make sure that the VM is functioning correctly on the new datastore. You may need to reconfigure any paths or settings like NICs or other devices that depend on the VM's new location.
Step 12: Clean Up
If you used the copy feature, you can delete the VM from the source datastore if it was successfully copied. But make sure that carried out in Step 11 of this tutorial before doing so.
This process shows you how to move a virtual machine between datastores on an ESXi host without using vCenter. Always have backups and perform these operations during maintenance windows to minimize potential disruptions.
If you've found this useful, you may want to sign up to our newsletter where you'll receive notices on when we post new articles and helpful "how tos". Just fill out your details below and we'll do the rest…


