


Today I'm going to show you how to adjust the border colours for your application Windows in Windows 10. This will also work in Remote Desktop servers like Windows 2016 and 2019. The standard installation has basically no shadowing or colours around individual windows making it hard to distinguish which window has the focus and moving from application to application.
Lets start...
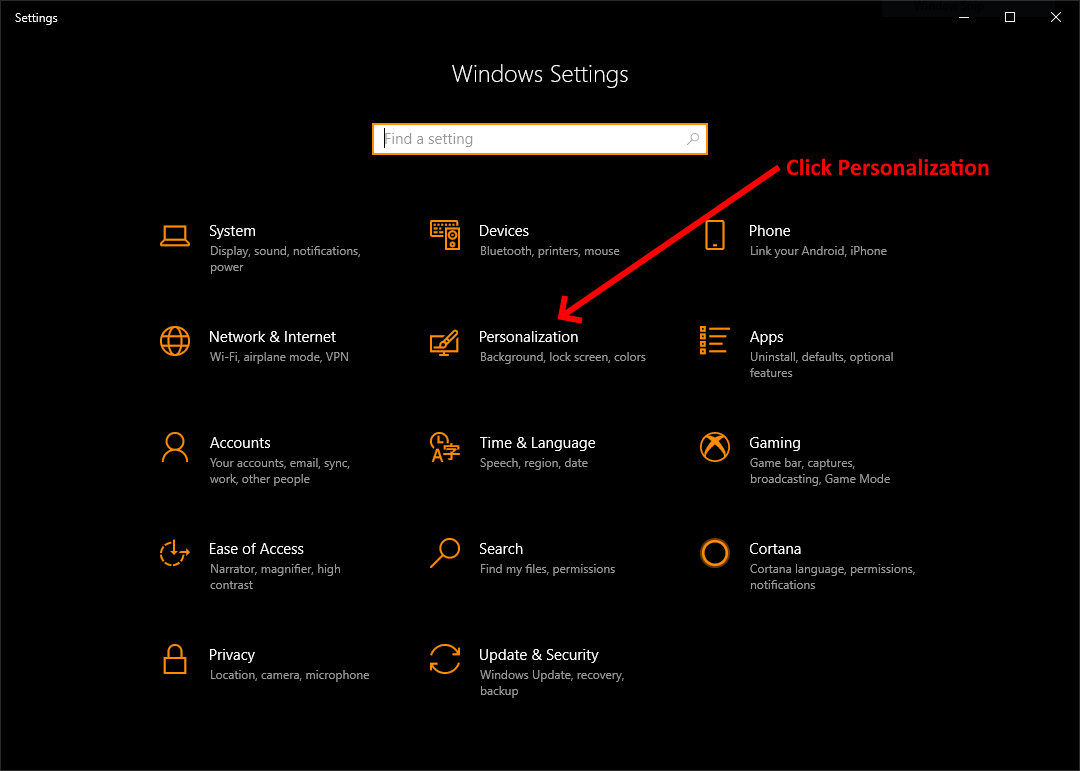
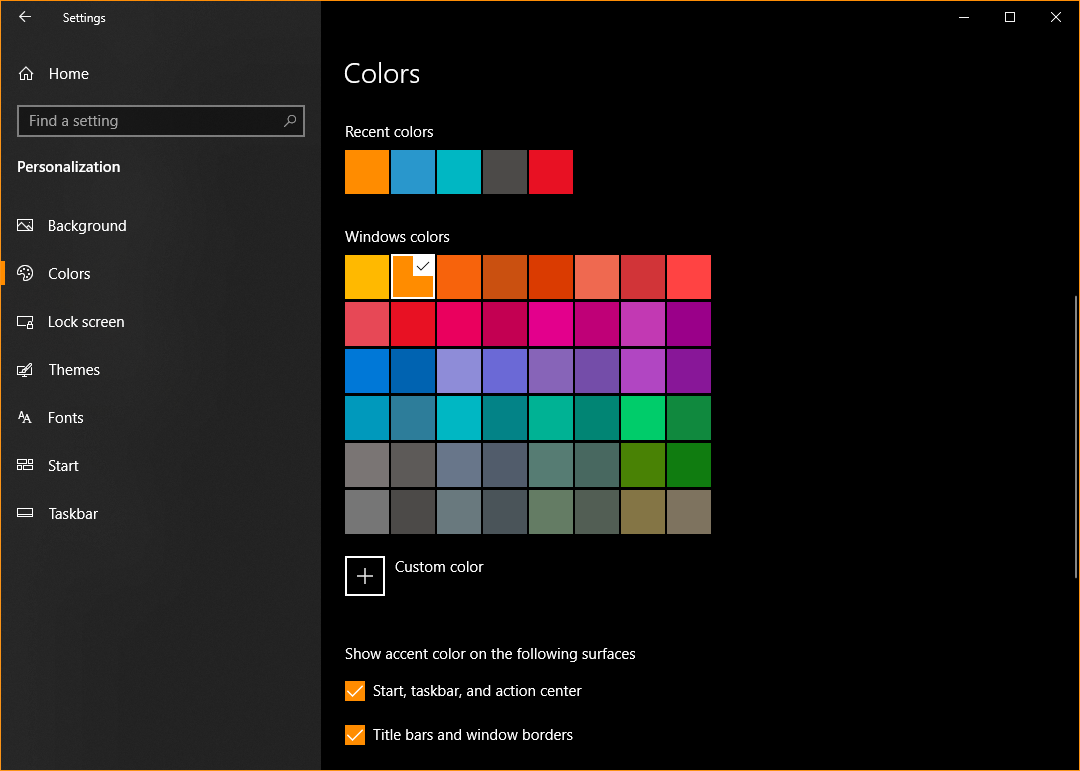
We're going to be doing this via Windows Settings, so to open the settings screen click the Start button and then click the little Gear Icon on the left of your start menu. You should now see something similar to the screenshot below. Please be aware, I have my Windows set to dark mode and that is why everything appears with black backgrounds. Yours may have a white background. Follow the instructions outlined in the screenshots below:
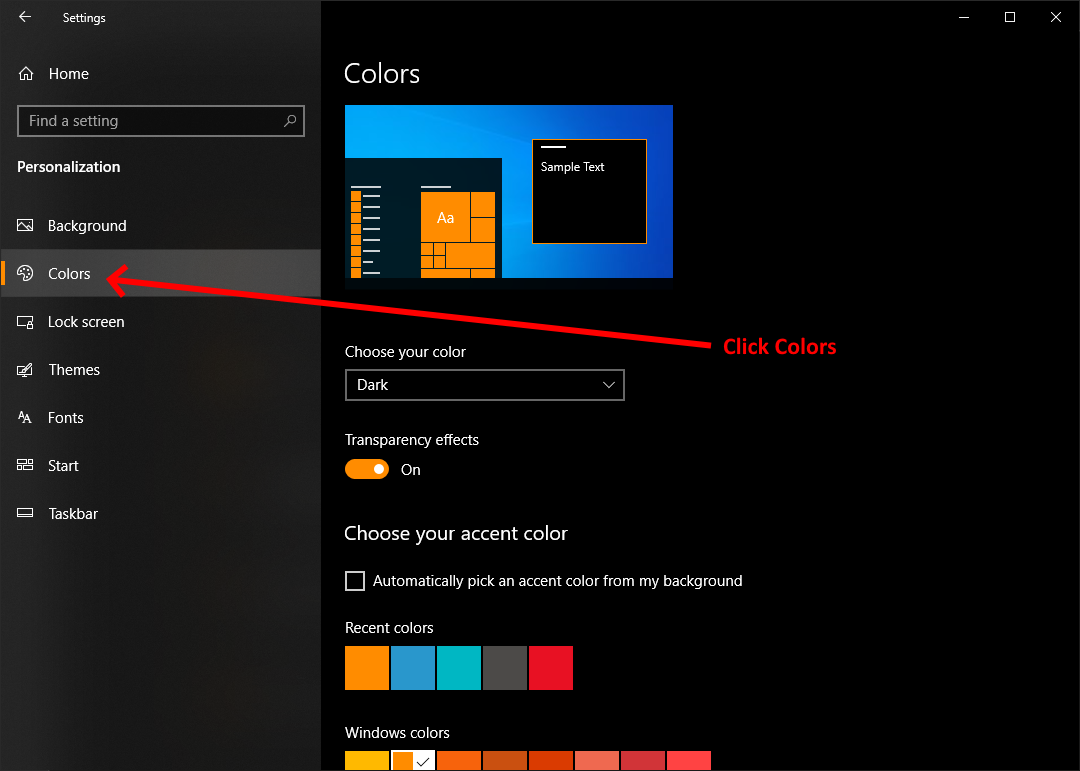
Scroll down to view additional settings in the colour options and follow the instructions below:
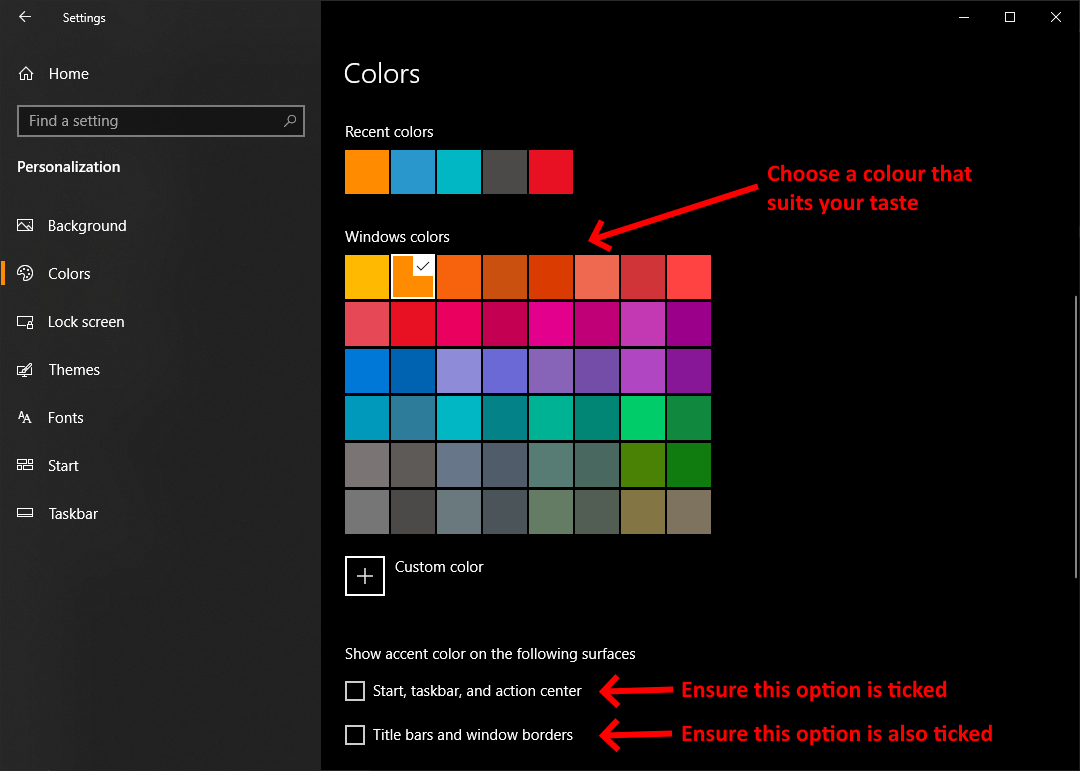
Now notice that once those options are ticked, you will have a border colour around the window in the colour of your choice as shown in the example below. It might be a bit hard to see in the image, but on your screen on your computer it will be quite pronounced and make your life easier in distinguishing between open applications.
That's all that's required. Play around with the colours until you have your preferred setup.
If you've found this useful, you may want to sign up to our newsletter where you'll receive notices on when we post new articles and helpful "how tos". Just fill out your details below and we'll do the rest...


