


The DHCP server is an essential component of any network environment that manages the allocation of IP addresses and other network configuration settings for devices on the network. It is crucial to back up the DHCP server settings regularly to prevent data loss in the event of server failure or migration to a new server.
Today I'm going to show you in detail how to backup the DHCP server settings on Windows Server 2016 and restore the backup to a new Windows Server 2022 server. We needed to do this for a client recently, so I thought it was a good idea to document the process. Their DHCP server had a lot of Reservations and other custom settings that we didn't want to have to manually re-create, so this was a more elegant method of migrating the whole DHCP setup.
Step 1: Backing up the DHCP Server Settings on Windows Server 2016
The first step to backup the DHCP server settings on Windows Server 2016 is to open the DHCP console. To do this, follow these steps:
- On the Windows Server 2016 desktop, click the Start button.
- Type "dhcpmgmt.msc" in the search box and press Enter.
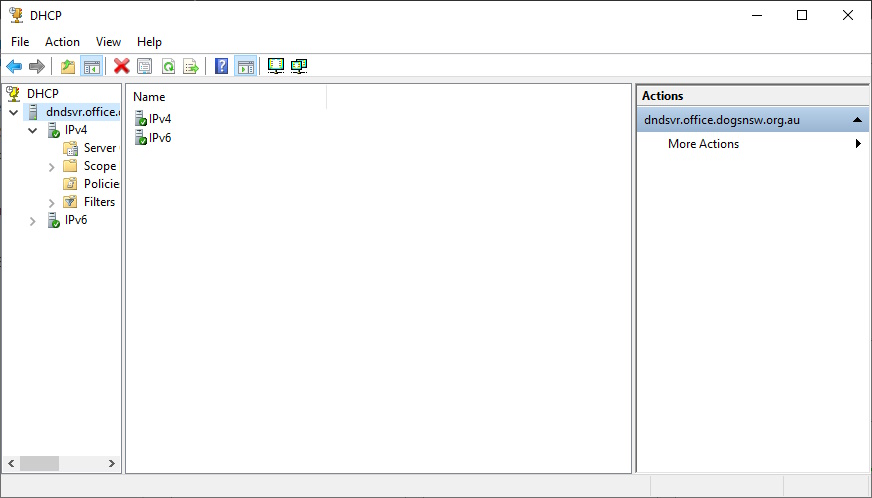
- The DHCP console will open like in the following screenshot:
Step 2: Backup the Windows 2016 DHCP server settings
Once you have opened the DHCP console, the next step is to export the DHCP server settings. You can do this by following these steps:
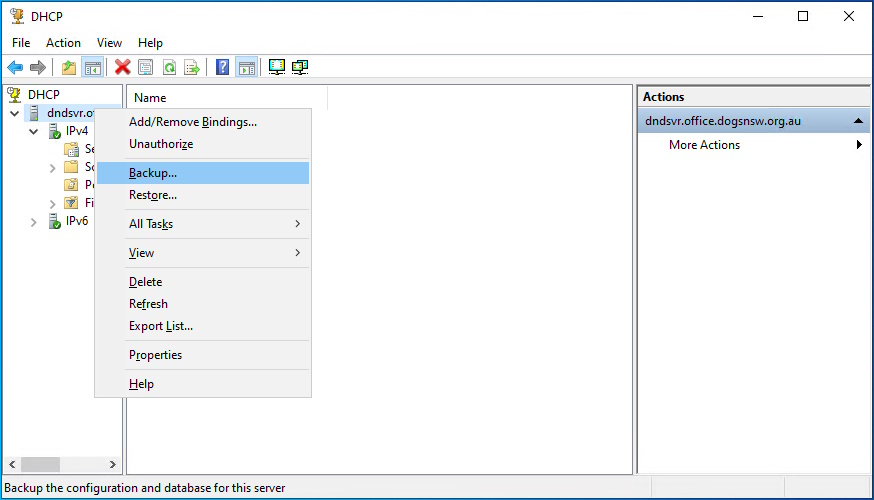
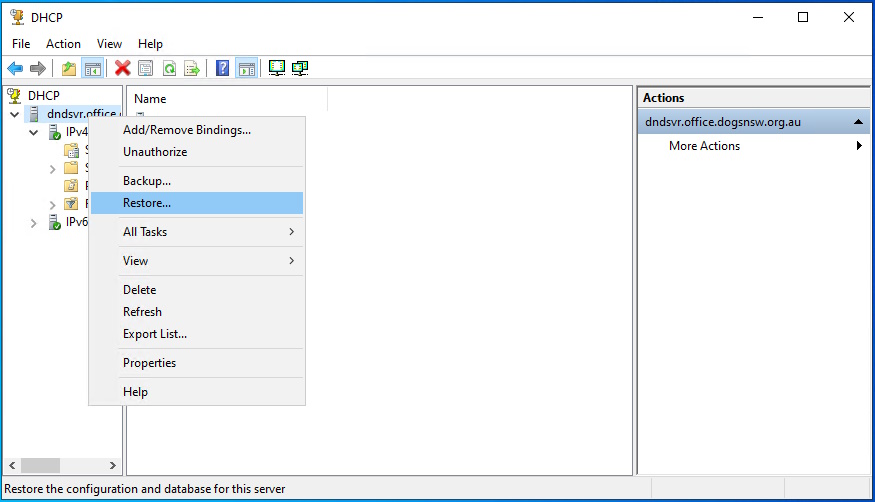
In the DHCP console, right-click the DHCP server name and select "Backup" like the following screenshot:
In the "Browse for Folder" dialog box, choose a location to save the DHCP server settings backup. Leave the default location of C:\Windows\System32\dhcp\backup because it will be easier in the steps below. Click the "OK" button to start the backup process.
It is important to note that the backup process may take several minutes depending on the size of the DHCP server settings. Once the backup process is complete, you will have a backup of the DHCP server settings.
Step 3: Verify the DHCP server settings backup
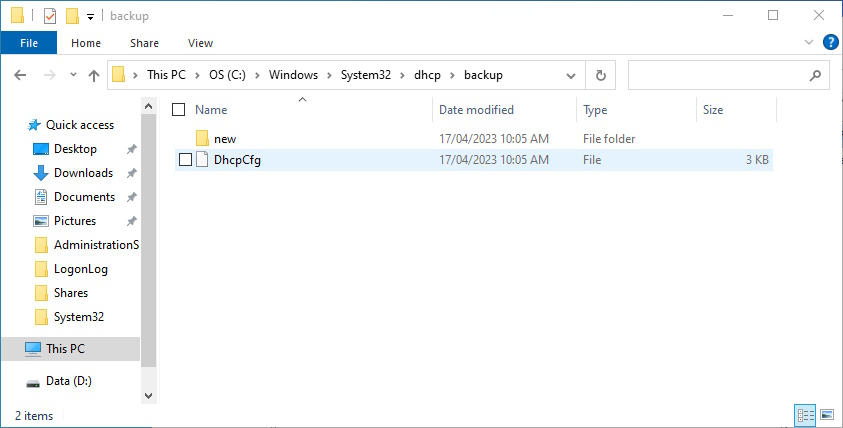
After backing up the DHCP server settings, it is important to verify that the backup is complete and contains all the necessary settings. You can do this by checking the backup folder to ensure that all the files have been created and that they are the correct size. This step is crucial as it helps to ensure that the backup is valid and can be restored in the event of a server failure or migration to a new server. A screenshot of what to expect in you backup folder is shown below:
Step 4: Restoring the Backup to a New Windows Server 2022 Server
The first step in restoring the DHCP server settings backup to a new Windows Server 2022 server is to install the DHCP Server role on the new server. You can do this by following these steps:
On the new Windows Server 2022 server:
- Click the Start button
- Type "Server Manager" in the search box and press Enter
- In the Server Manager window, click the "Add roles and features" link
- Click the "Next" button until you reach the "Server Roles" page
- Select "DHCP Server" from the list of available roles
- Click the "Add Features" button if prompted
- Click the "Next" button until you reach the "Confirmation" page
- Click the "Install" button to install the DHCP Server role.
Step 5: Copy the backup files to the new server
Once you have installed the DHCP Server role on the new server, the next step is to copy the backup files from the old server to the new server. You can do this by following these steps:
I'm assuming both of your serves are on the same network, so on the old Windows 2016 server, locate the backup folder via Windows File Explorer. If you used the default location it should be C:\Windows\System32\dhcp\backup.
Then open a new Windows File Explorer window and in the address bar type in \\NewServerName\C$\Windows\System32\dhcp\backup (Replace NewServerName with the name of your Win 2022 server).
Now copy all the contents from the Win 2016 C:\Windows\System32\dhcp\backup folder to the new Win 2022 server location at \\NewServerName\C$\Windows\System32\dhcp\backup
Step 6: Restore the DHCP server settings from backup
After copying the backup folder to the new server, the next step is to restore the DHCP server settings from your backup. In the DHCP console, right-click the DHCP server name and select "Restore" like the following screenshot:
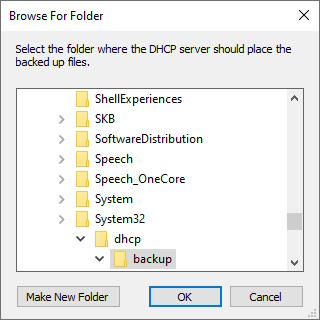
Now browse to your backup folder and if you kept the default it should go to that location by default like the following screenshot:
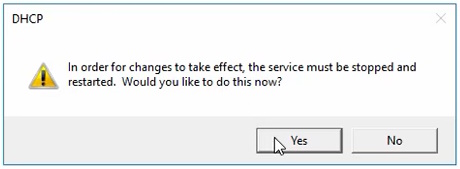
Click OK and you will receive a prompt saying the DHCP will need to be restarted. Click Yes.
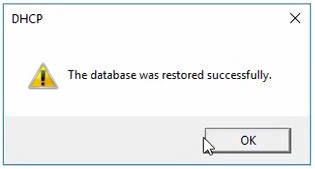
Once the restore task is complete you should receive a pop indicating it was successful like the following:
Once you've confirmed that your DHCP has been successfully restored to the new server, you will need to stop the and disable the service on your old Win 2016 server. This will prevent a DHCP conflict. Once you've stopped the service on the old Win 2016, then restart the DHCP service on your new Win 2022 and check that it is servicing you network with DHCP requests.
If everything is as it should be, your task is complete...
If you've found this useful, you may want to sign up to our newsletter where you'll receive notices on when we post new articles and helpful "how tos". Just fill out your details below and we'll do the rest…


