


AppLocker is a Group Policy based feature in Windows that allows you to control which applications are allowed to run on your systems. This has now replaced the old Software Restriction Policy which has been deprecated by Microsoft.
Historically, you could only use AppLocker on Windows Enterprise Licensed Desktop OS and Windows Server level licenses. Since the depreciation of Software Restriction Policies, you can now use AppLocker on Windows Desktop OS Pro and above. The server level licensing requirements remain the same.
Here's a step-by-step guide on how to create a Group Policy Object (GPO) to apply AppLocker to a domain.
Log onto your Win 2022 domain controller and follow the steps below:
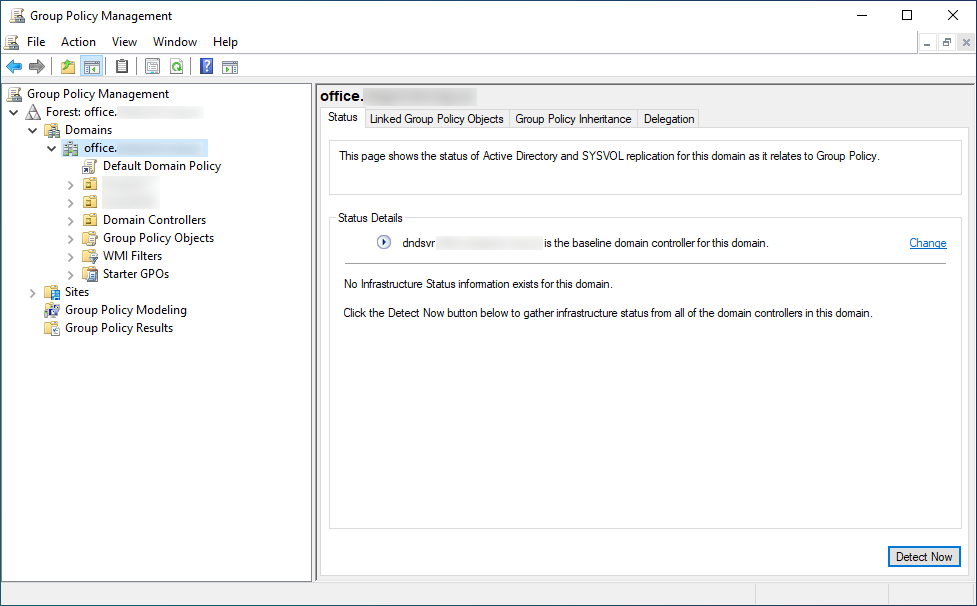
Step 1: Open Group Policy Management Console (GPMC) by pressing the Windows Key + R to open the Run dialog. Type gpmc.msc and press Enter. You should see something similar to the following Management Console appear:
Step 2: Create a new Group Policy Object. In the Group Policy Management Console, expand the forest and domain, and then right-click on the domain where you want to create the GPO. Choose "Create a GPO in this domain, and Link it here…" Give your GPO a meaningful name, and click OK.
Step 3: Edit the Group Policy Object. In the Group Policy Management Console, right-click on the newly created GPO and select "Edit."
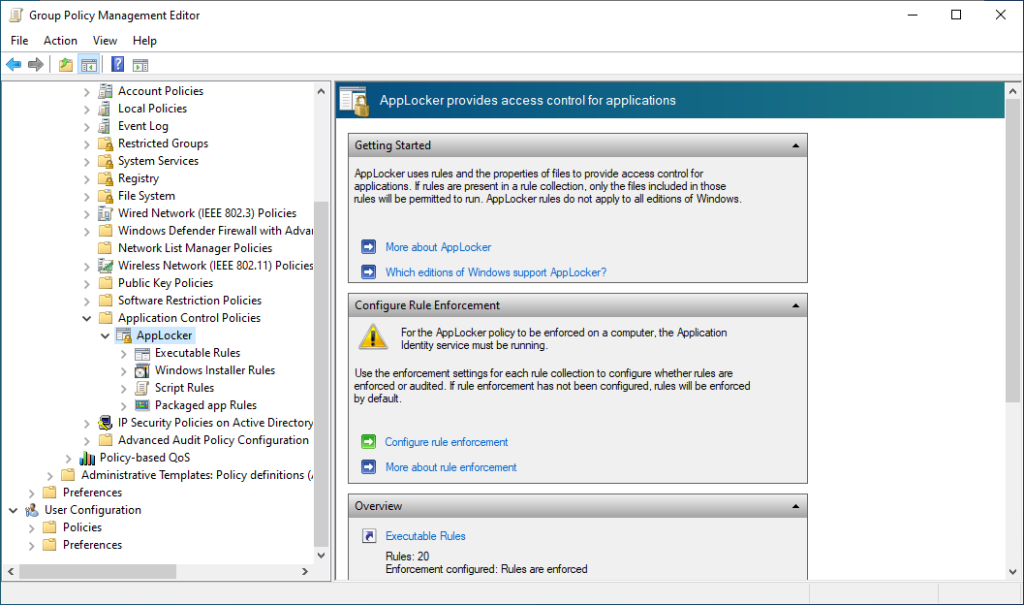
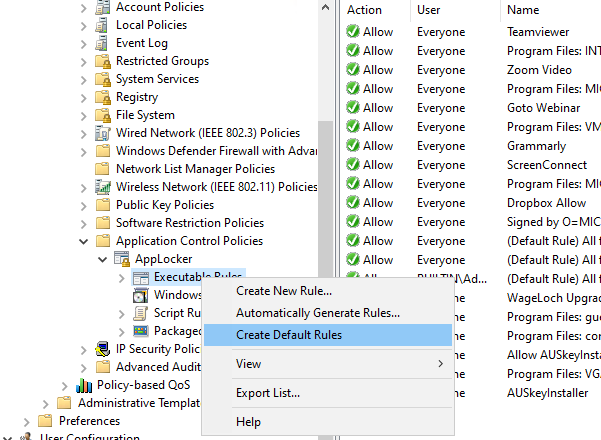
Step 4: Configure AppLocker Policies. In the Group Policy Management Editor, navigate to Computer Configuration -> Policies -> Windows Settings -> Security Settings -> Application Control Policies -> AppLocker. In the AppLocker folder you will see 4 groups of rules you can customise and they are Executable Rules, Windows Installer Rules, Script Rules and Package App Rules. See the following screenshot as an example:
Click the "Configure Rule Enforcement" link in the screenshot above and check the boxes for the rule types you want to enforce (Executable, Windows Installer, Script). See screenshot below:
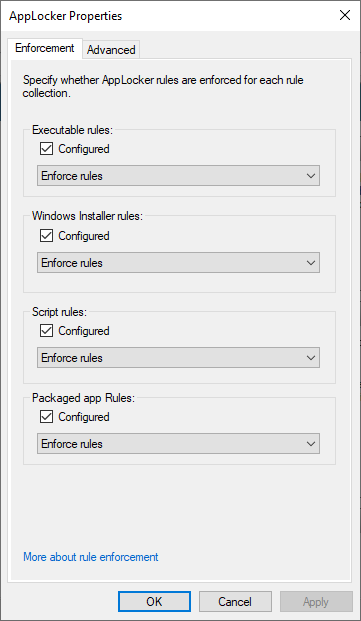
Click "OK" to apply the changes.
Step 5: Create AppLocker Rules. Right-click on each rule type (Executable, Windows Installer, Script) and choose "Create Default Rules." This will create a set of default rules to get you started. See screenshot below:
If needed, you can create additional rules by right-clicking on the corresponding rule type and selecting "Create New Rule." Microsoft have a detailed explanation on how to create custom rules here...
Step 6: Link the GPO to the desired Organizational Unit (OU). Close the Group Policy Management Editor. In the Group Policy Management Console, navigate to the Organizational Unit (OU) where you want to apply the AppLocker policies.
Right-click on the OU and choose "Link an Existing GPO." Select the GPO you created earlier and click OK.
Step 7: Force Group Policy Update. After linking the GPO, you may need to force a Group Policy update on the client computers. You can do this by running the following command in a Command Prompt on the client machines:
gpupdate /force
Step 8: Verify AppLocker Policies. On a client machine that is included in the OU you applied the AppLocker GPO to, open the Event Viewer (eventvwr.msc).
Navigate to Applications and Services Logs -> Microsoft -> Windows -> AppLocker -> EXE and DLL. See screesnhot below:
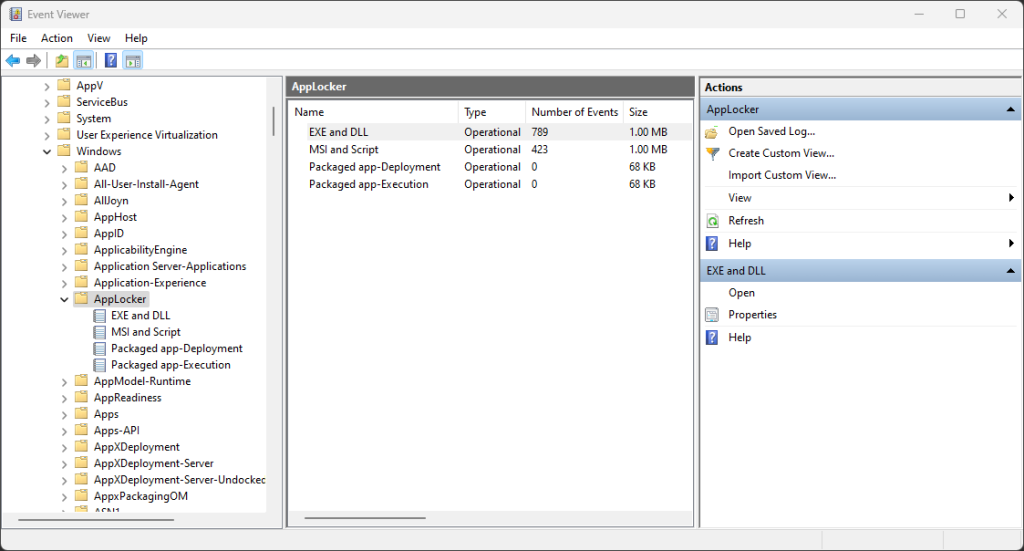
Check for any AppLocker related events to ensure that the policies are being applied correctly. Also, this is where you kind find events of programs that have been blocked by your policy and show you what needs to be whitelisted to allow them to run.
Once you've completed these steps, AppLocker should be configured and applied to the specified domain and Organisational Units. Remember to test your AppLocker policies in a controlled environment before implementing them in a production environment.
This is just another tool to add to your arsenal to protect your end users from ransomware and unwanted applications running in your environment.
If you've found this useful, you may want to sign up to our newsletter where you'll receive notices on when we post new articles and helpful "how tos". Just fill out your details below and we'll do the rest…


