Today I'm going to show you how to setup In-Place Archiving for your M365/O365 users. I had read a lot of the virtually useless Microsoft articles trying to understand how this works and what the implications are and was more confused than enlightened when it came to this topic.
I sometimes wonder whether the people compiling those Microsoft articles have any idea about what they're writing about and how the real world operates with regard to time and getting to the root of the problem. Most of it is just fluff and techno babble for the sake of using some "buzz" words. In most cases I end up more confused when reading them than when I first started researching the problem. Just read this article, and you'll know what I'm talking about.
Enough of me and my "soap-box", there's a buzz word for you, and let's get to tackling this problem.
You've discovered one or more of the users in your tenant is reaching or has reached the limit in email storage for their account. How can you preserve their email without forcing them to delete email content from their account?
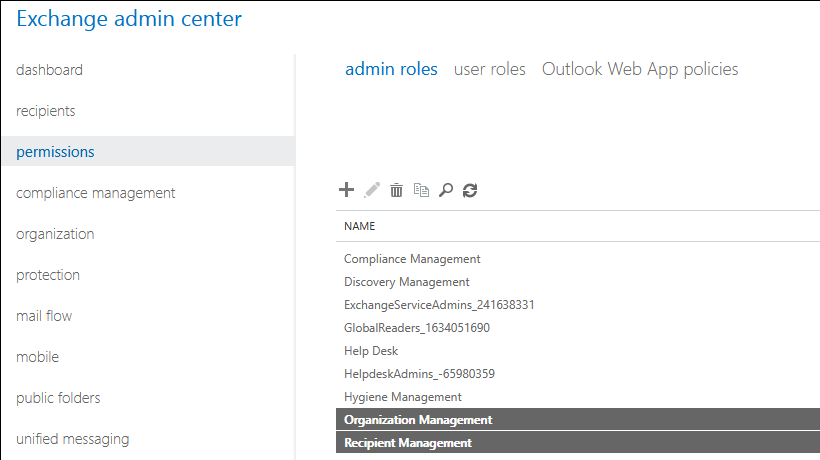
Before you begin, ensure you have made your admin account a member of the following two admin roles, because otherwise you won't be able to access the Archive section of the portal. Apparently Microsoft's definition of Global Admin is different to you and I where Global means "most" sections rather than all. 🙂
To do that, simply open the Exchange Admin Center and click Permissions. Under admin roles you need to add your admin account to the two roles highlighted in the screenshot below:
Once you've done that, you're ready to embark on your quest.
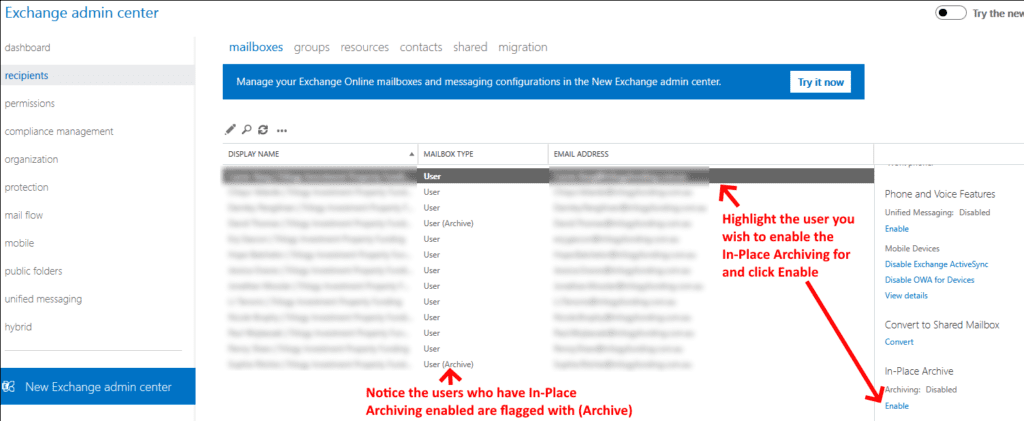
The actual enabling of the In-Place Archive for your users is very simple. Once again, go to your Exchange Admin Center and click Recipients > Mailboxes. From there you'll see a list of all your current users and we can choose who we want to enable the In-Place Archiving for by following the screenshot below:
That's it, your enabling of the Archive is complete. But, there are additional issues you may need to be aware of, one of which it can take up to 7 days for the archive to commence. This can be frustrating because if your user is already at the limit of their mailbox size, you don't have the luxury of waiting that 7 days. To fast track the the Archive creation, we can do that via PowerShell. Open PowerShell in admin mode and carry out the following commands:
Import-Module MsOnline
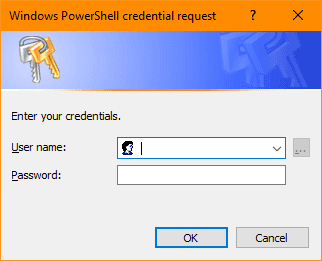
Now we're going to logon to our M365 Tenant using our admin credentials after running the following command:
$LiveCred = Get-Credential
Once we've successfully logged on we'll create a new session: (All one line, there should be no line breaks in the syntax below):
$Session = New-PSSession -ConfigurationName Microsoft.Exchange -ConnectionUri https://ps.outlook.com/powershell/ -Credential $LiveCred -Authentication Basic -AllowRedirection
Next we'll set the execution policy using the syntax below:
Set-ExecutionPolicy Unrestricted
Now we can import the session we created earlier:
Import-PSSession $Session -DisableNameChecking
You're now connected to your tenant as admin and we can now execute the "enabling" of the archive for a mailbox. Please change [email protected] to the mailbox email address of the user you wish to force the commencement of the archive process:
Start-ManagedFolderAssistant -Identity [email protected]
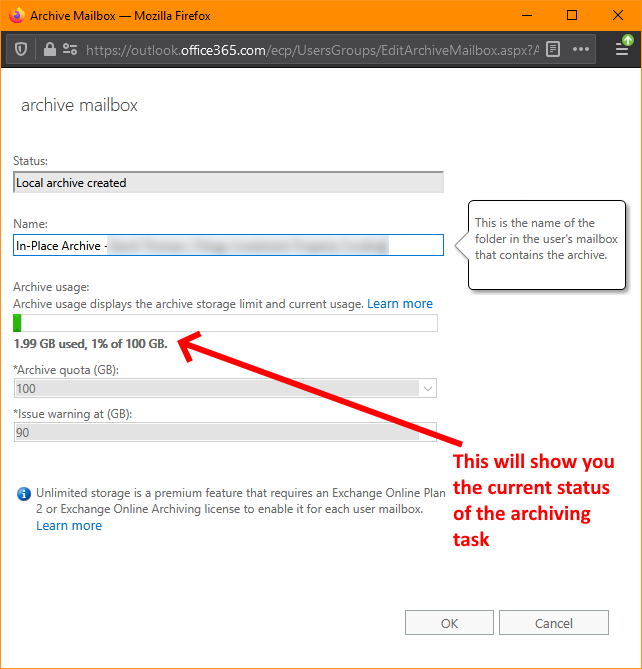
You should start to see the archive being populated in roughly 60 minutes. you can check the progress of how much email has been archived by going back to your Exchange Admin Center and highlighting the user and click View Details in the In-Place Archive section of the users details. You should see something like the following screenshot:
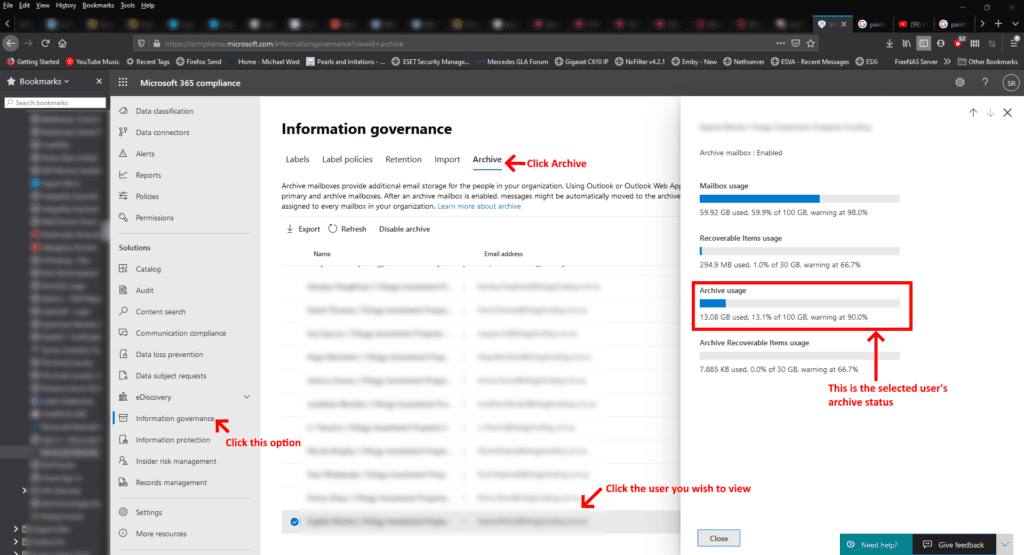
You can also review the Archive status via the Information Governance section in Compliance via the following link... See the screenshot below for an example on how to use it:
If you've found this useful, you may want to sign up to our newsletter where you'll receive notices on when we post new articles and helpful "how tos". Just fill out your details below and we'll do the rest…