


Today I'm going to show you how to setup up a Mikrotik router to use DNS over HTTPS using Cloudflare's Gateway DNS Locations.
What is cool about this is that not only are you using Cloudflare for things like content filtering and DNS for your environment, but in this case, we're going to include the additional feature of DNS over HTTPS that provides with you additional security to help prevent others reviewing your DNS queries.
For the purpose of this tutorial, I'm assuming you already have your Cloudflare DNS Locations setup. If not, before starting the Mikrotik setup, go through the following article to setup your Cloudflare DNS Locations before proceeding.
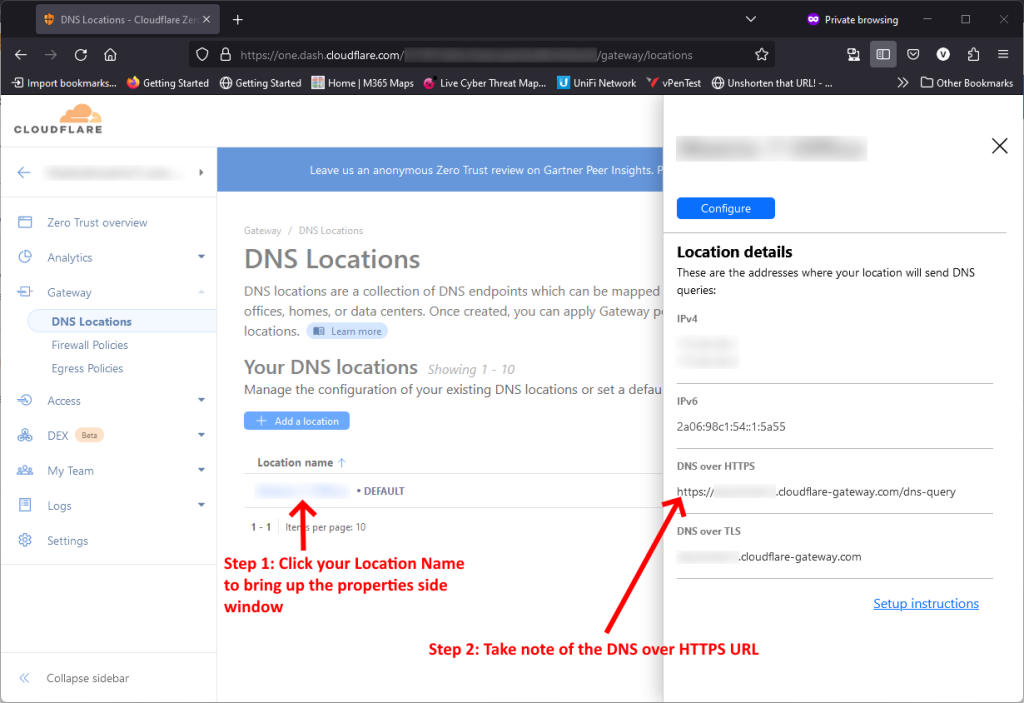
Once setup, go to the Zero Trust > Gateway > DNS Locations. From there follow the screenshot below:
Before we commence the Mikrotik setup, you need to download the root certificates so we can import them into your Mikrotik router. You can do that via the following link...
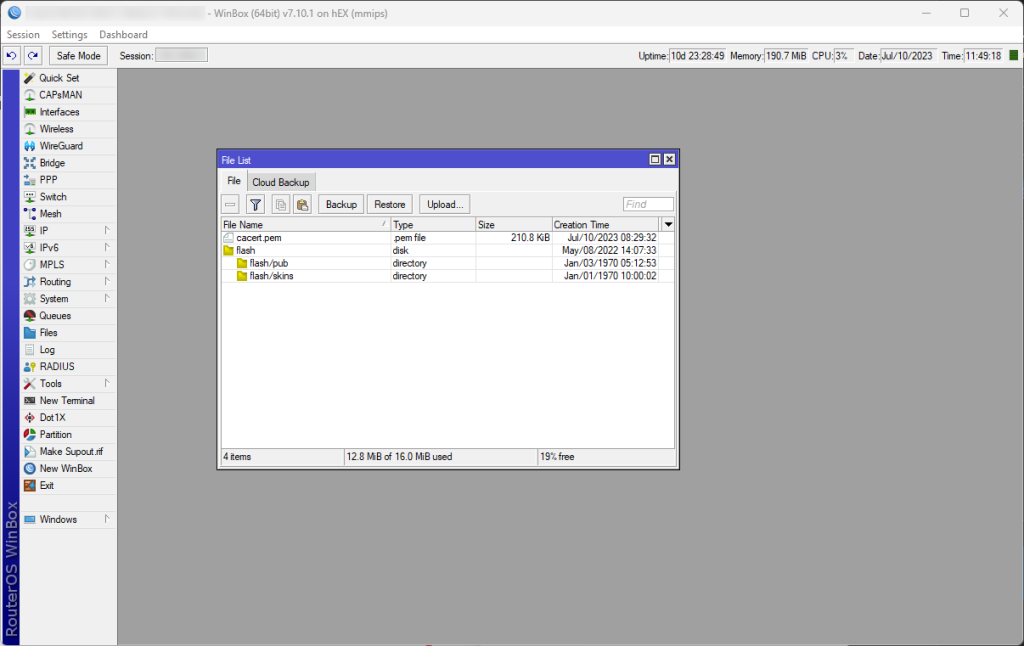
We're now going to start the Mikrotik router setup. Open Winbox and log onto your router as the administrator. Now drag and drop the cacert.pem file that you downloaded in the previous step into your Winbox window and you should have something like the following screenshot:
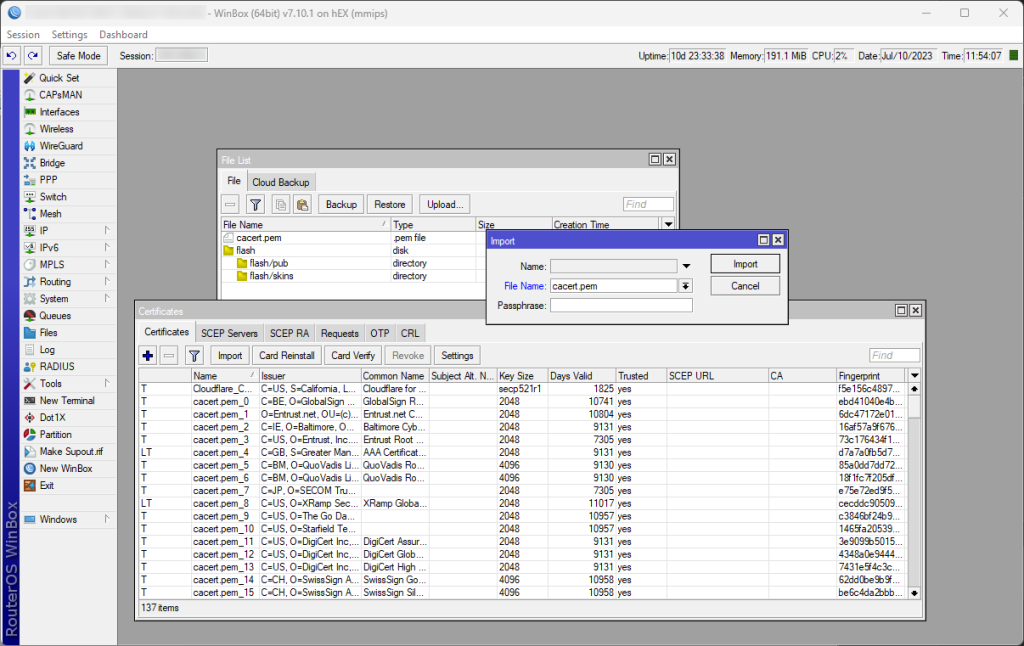
We're now going to import the cacert.pem file into your Mikrotik Certificates. In Winbox click System > Certificates. Now click Import and choose cacert.pem from the drop down list and click Import. Here is a screenshot to visualise what to expect:
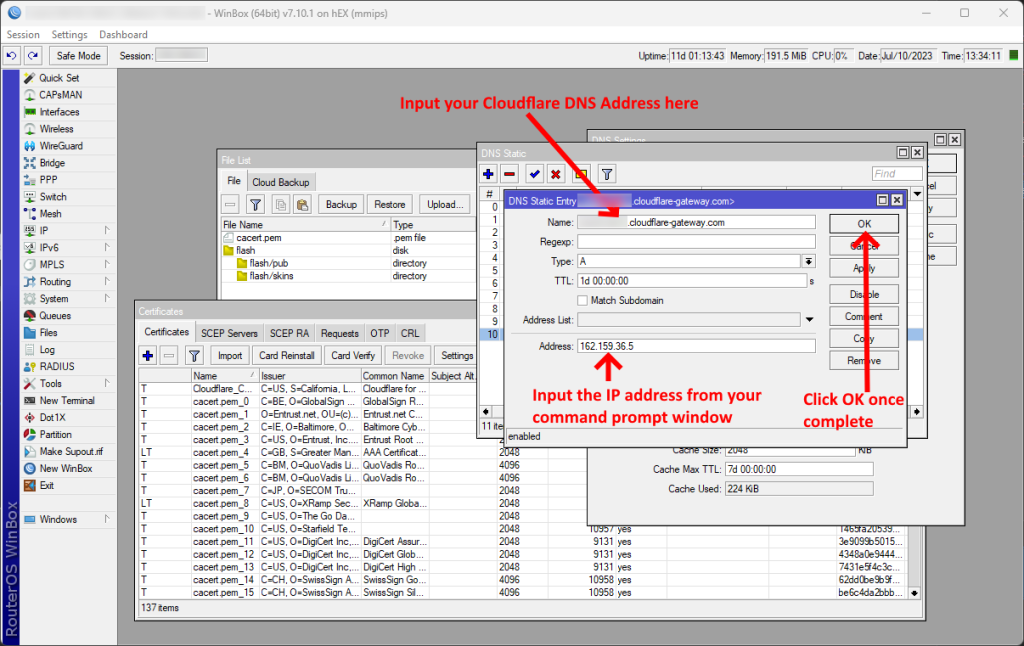
We're now ready to setup the DNS over HTTPS in your Mikrotik router. First, we're going to set a static DNS entry to your Cloudflare DNS over HTTPS instance. At the beginning of this article you should have taken note of your Cloudflare DNS over HTTPS URL. It should look something like:
https://abs123xyz.cloudflare-gateway.com/dns-query
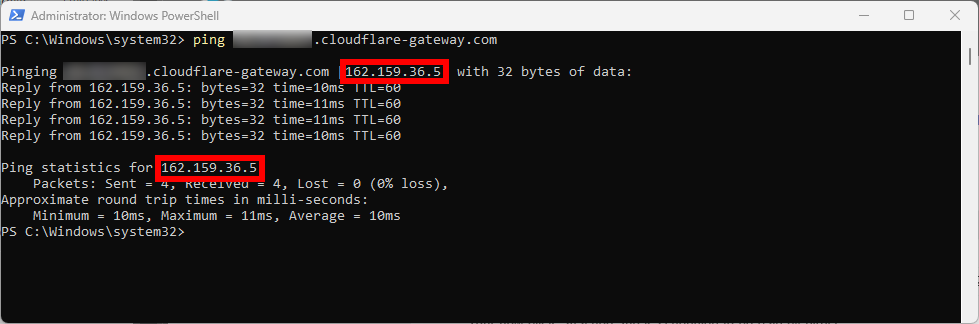
Open a command prompt on your computer and we're going to instigate a ping to the DNS value of your your URL. For example:
ping abc123xyz.cloudflare-gateway.com
Do not input the whole URL, just the DNS address. This should return the IP Address of your Cloudflare instance. We're going to need this IP Address for the next step and you should see it displayed in your command prompt window like the following example:
Now go back to your Winbox instance and click IP > DNS and the DNS Setting window will be displayed. Click Static then the '+' icon so we can add a static address using the two values we harvested above, the DNS Address and the IP Address. Use the following screenshot as a guide:
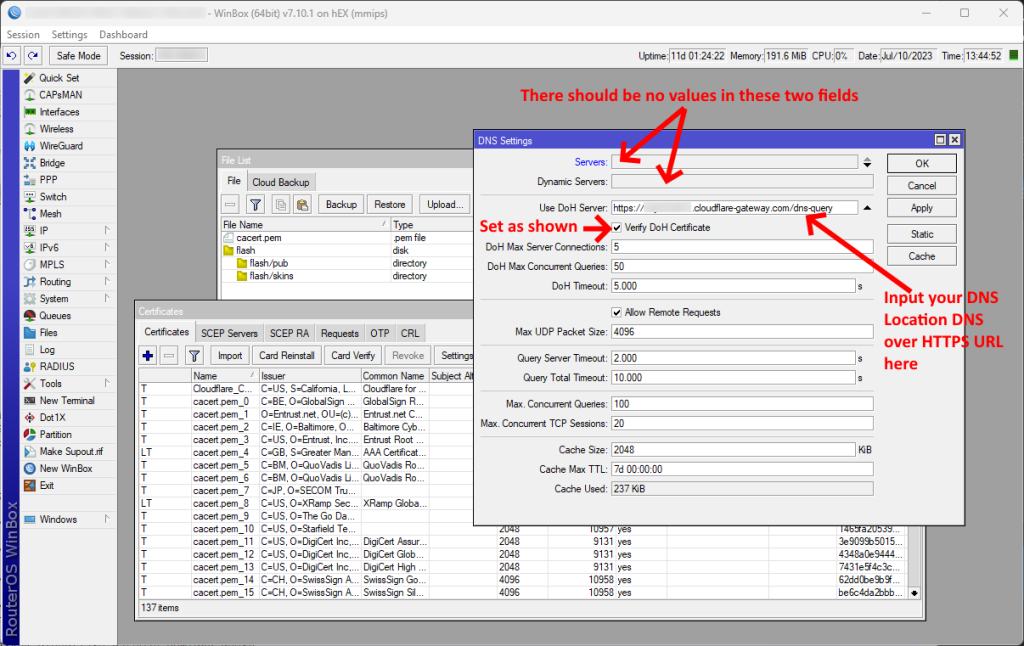
Now go back to your DNS Settings window in Winbox and paste the whole URL from your Cloudflare DNS Location into the Use DoH Server field. It should be something like this:
https://abc123xyz.cloudflare-gateway.com/dns-query
Make sure you have no DNS Server IPs listed and also no Dynamic Servers listed in the DNS Settings window. It should look like the following example:
That's it, the Mikrotik portion of the setup is now also complete. So how do you test whether your setup is actually working. Simply navigate to the following location in your favourite browser:
As long as the computer is using the router for it's DNS the page should return Yes for Using DNS over HTTPS (DoH) like the following example:
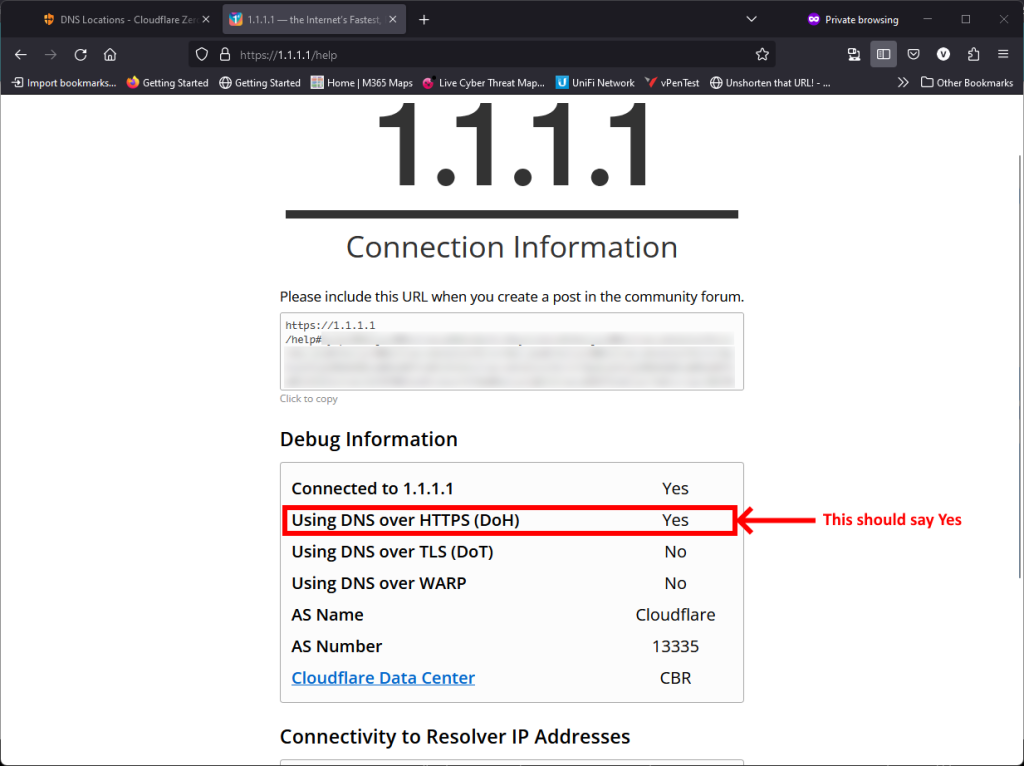
That's it, your task is complete!
If you've found this useful, you may want to sign up to our newsletter where you'll receive notices on when we post new articles and helpful "how tos". Just fill out your details below and we'll do the rest…


1 Response