


Today I'm going to show you how to install the O365 ADMX Administrative Templates onto your server so they can be used to apply O365 Group Policy Objects to your domain. This is handy so you can centrally manage features of Office 365 for your users/computers.
Before we begin we need to download the templates from Microsoft here...
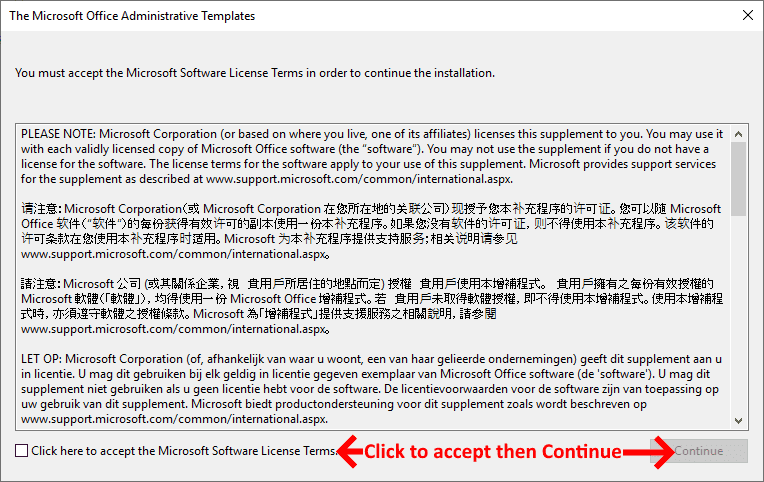
Make sure you choose the correct template for your Office 365 installation whether it's 32 Bit or 64 Bit. In my case it was the 32 Bit installation. Once downloaded, run the executable and you will be prompted to accept the licensing agreement as in the following example:
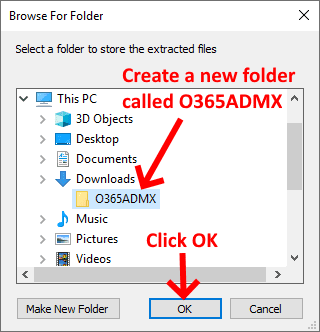
Now you will be prompted for location to save the ADMX file. I extracted my example to a folder called O365ADMX, but you can call yours whatever you like:
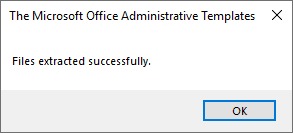
Once they've been extracted successfully you should see the following confirmation:
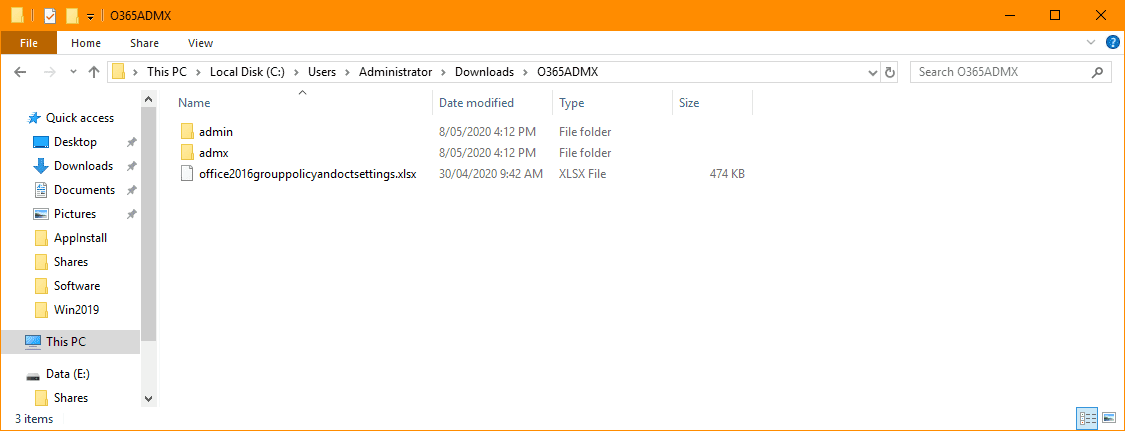
Now open Explorer and navigate to where you extracted the files to, in my case it was here: C:\Users\Administrator\Downloads\O365ADMX. Within your folder you should see the following folders and files:
Because I'll be applying these GPOs to an RDP server farm, I want to control how O365 is updated and therefore, don't want RDP users to be constantly bombarded with O365 update notices. So how do I do that?
The best method is via GPO or Group Policy Objects, but first we have to include our newly downloaded O365 ADMX Templates into our domain. To do that we need to copy the relevant ADMX files and language file into the following 2 directories:
ADMX Files go here:
C:\Windows\PolicyDefinitions
Language Files go here:
C:\Windows\PolicyDefinitions\en-US
The above indicates that we're using English for the language files (en-US), but in your case use your language folder and subsequent language files to suit your location.
As outlined earlier, I want to prevent the O365 update alerts for my RDP users, so to do that I'll have to include the office16.admx ADMX GPO file and office16.adml ADML language file.
So using my example above of the extracted O365 ADMX location of C:\Users\Administrator\Downloads\O365ADMX all I have to do is the following:
Copy:
C:\Users\Administrator\Downloads\O365ADMX\admx\office16.admx
To:
C:\Windows\PolicyDefinitions\office16.admx
Copy:
C:\Users\Administrator\Downloads\O365ADMX\admx\en-us\office16.adml
To:
C:\Windows\PolicyDefinitions\en-US\office16.adml
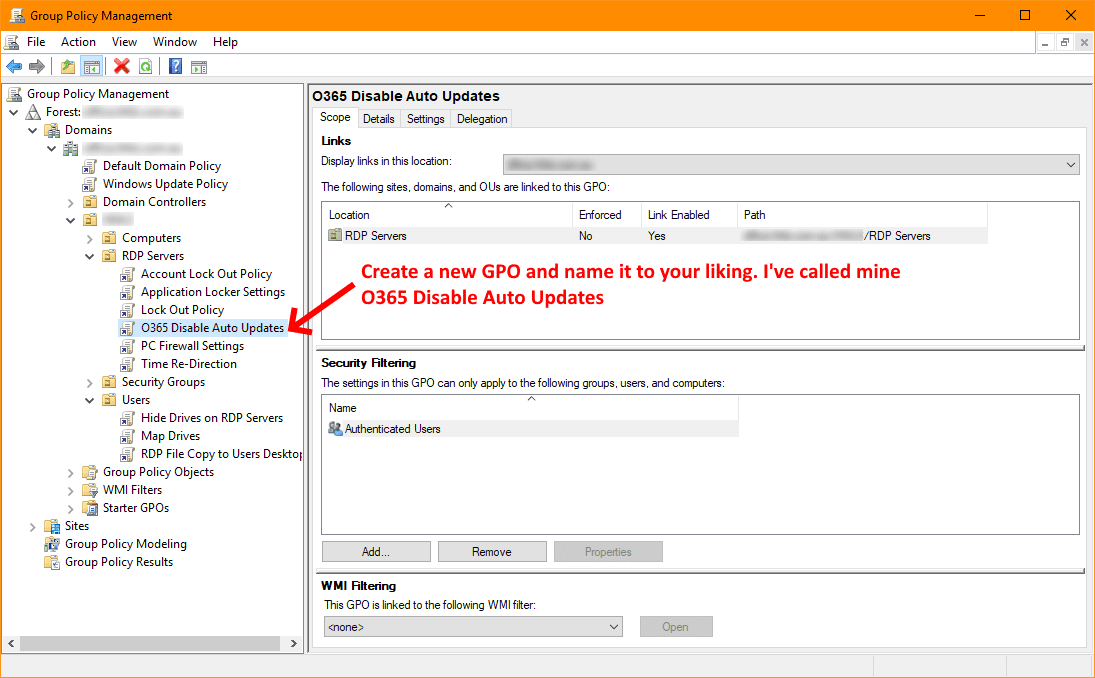
We're now ready to create our GPO. Open Server manager and click Tools > Group Policy Management and follow the screenshot below:
We're now going to edit our newly created GPO by right clicking and selecting Edit. Now navigate to Computer Configuration > Administrative Templates > Microsoft Office 2016 (Machine). This new GPO will be there if you've carried out the steps outlined above when you copied the relevant O365 GPO files. Now make the following changes as outlined in the screenshot below:
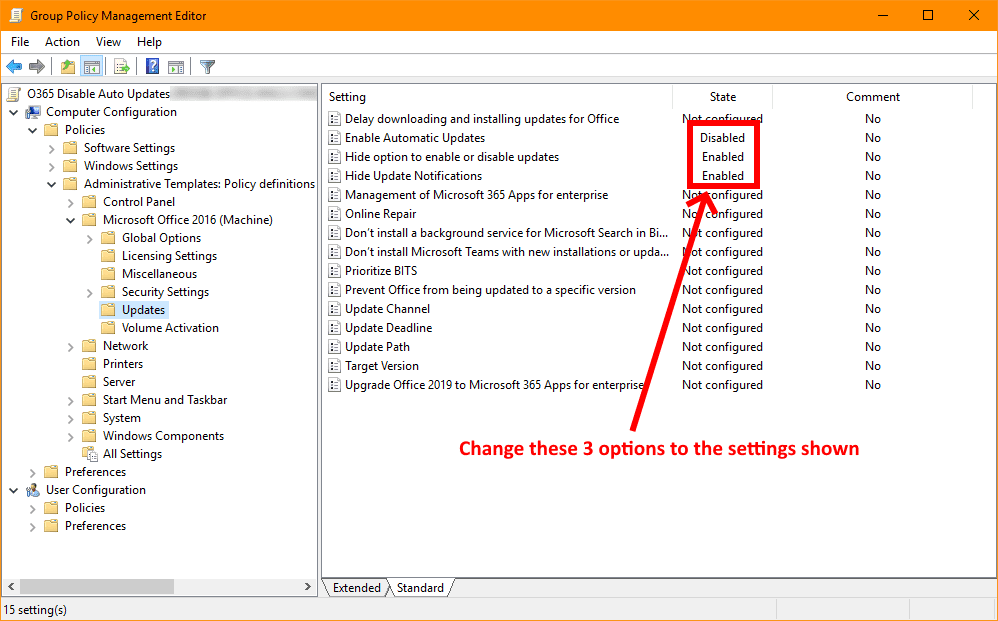
There are a myriad of other settings you can apply. All I've done in this example is prevent the Auto Update, but you can customise your installation of O365 with a heap of other options that this O365 ADMX pack provides. In the O365 ADMX download you can add additional ADMX files that target specific applications in office like Outlook, Word and Excel etc, and each have their own set of options you can customise to your environment.
All you have to do now is apply your newly created GPO to the computers in your Organisational Unit by using gpupdate /force at the command prompt and you're good to go...
If you've found this useful, you may want to sign up to our newsletter where you'll receive notices on when we post new articles and helpful "how tos". Just fill out your details below and we'll do the rest...


2 Responses